Hello there 👋
Upvote is a Slack app that enables you to run polls and collect ideas within Slack.
Upvote is designed to be simple, unintrusive and intuitive for both you as the poll author and your audience.
Teams regularly use Upvote to run attendance RSVP polls, team engagement surveys, collect and vote on product ideas, collect Q&A meeting questions, run quick ad-hoc votes to decide on a restaurant for lunch, etc.
To start off, there are two main poll types that Upvote offers you: Quick Polls and Open Polls.
Poll Types
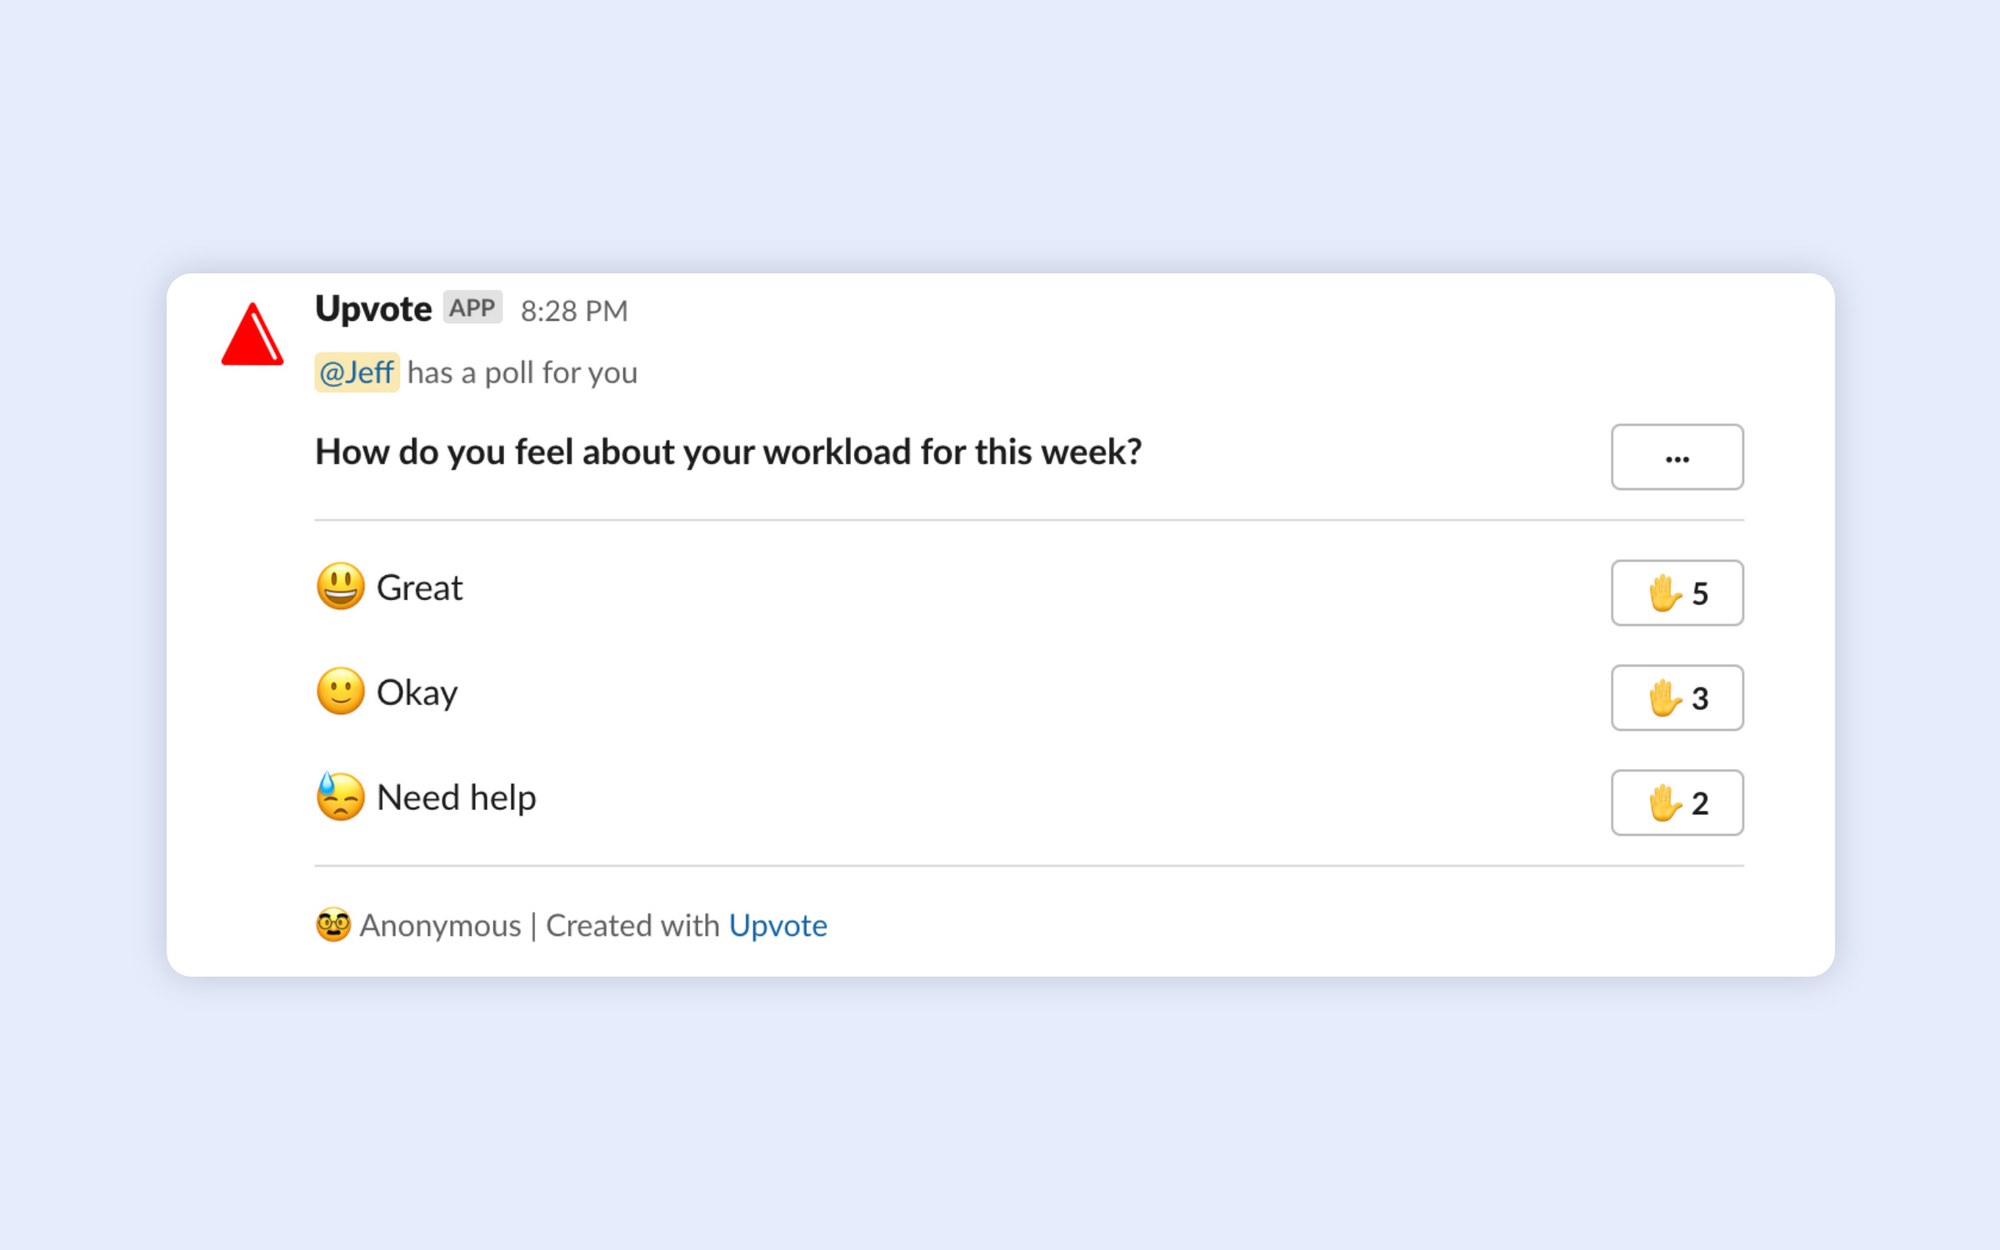
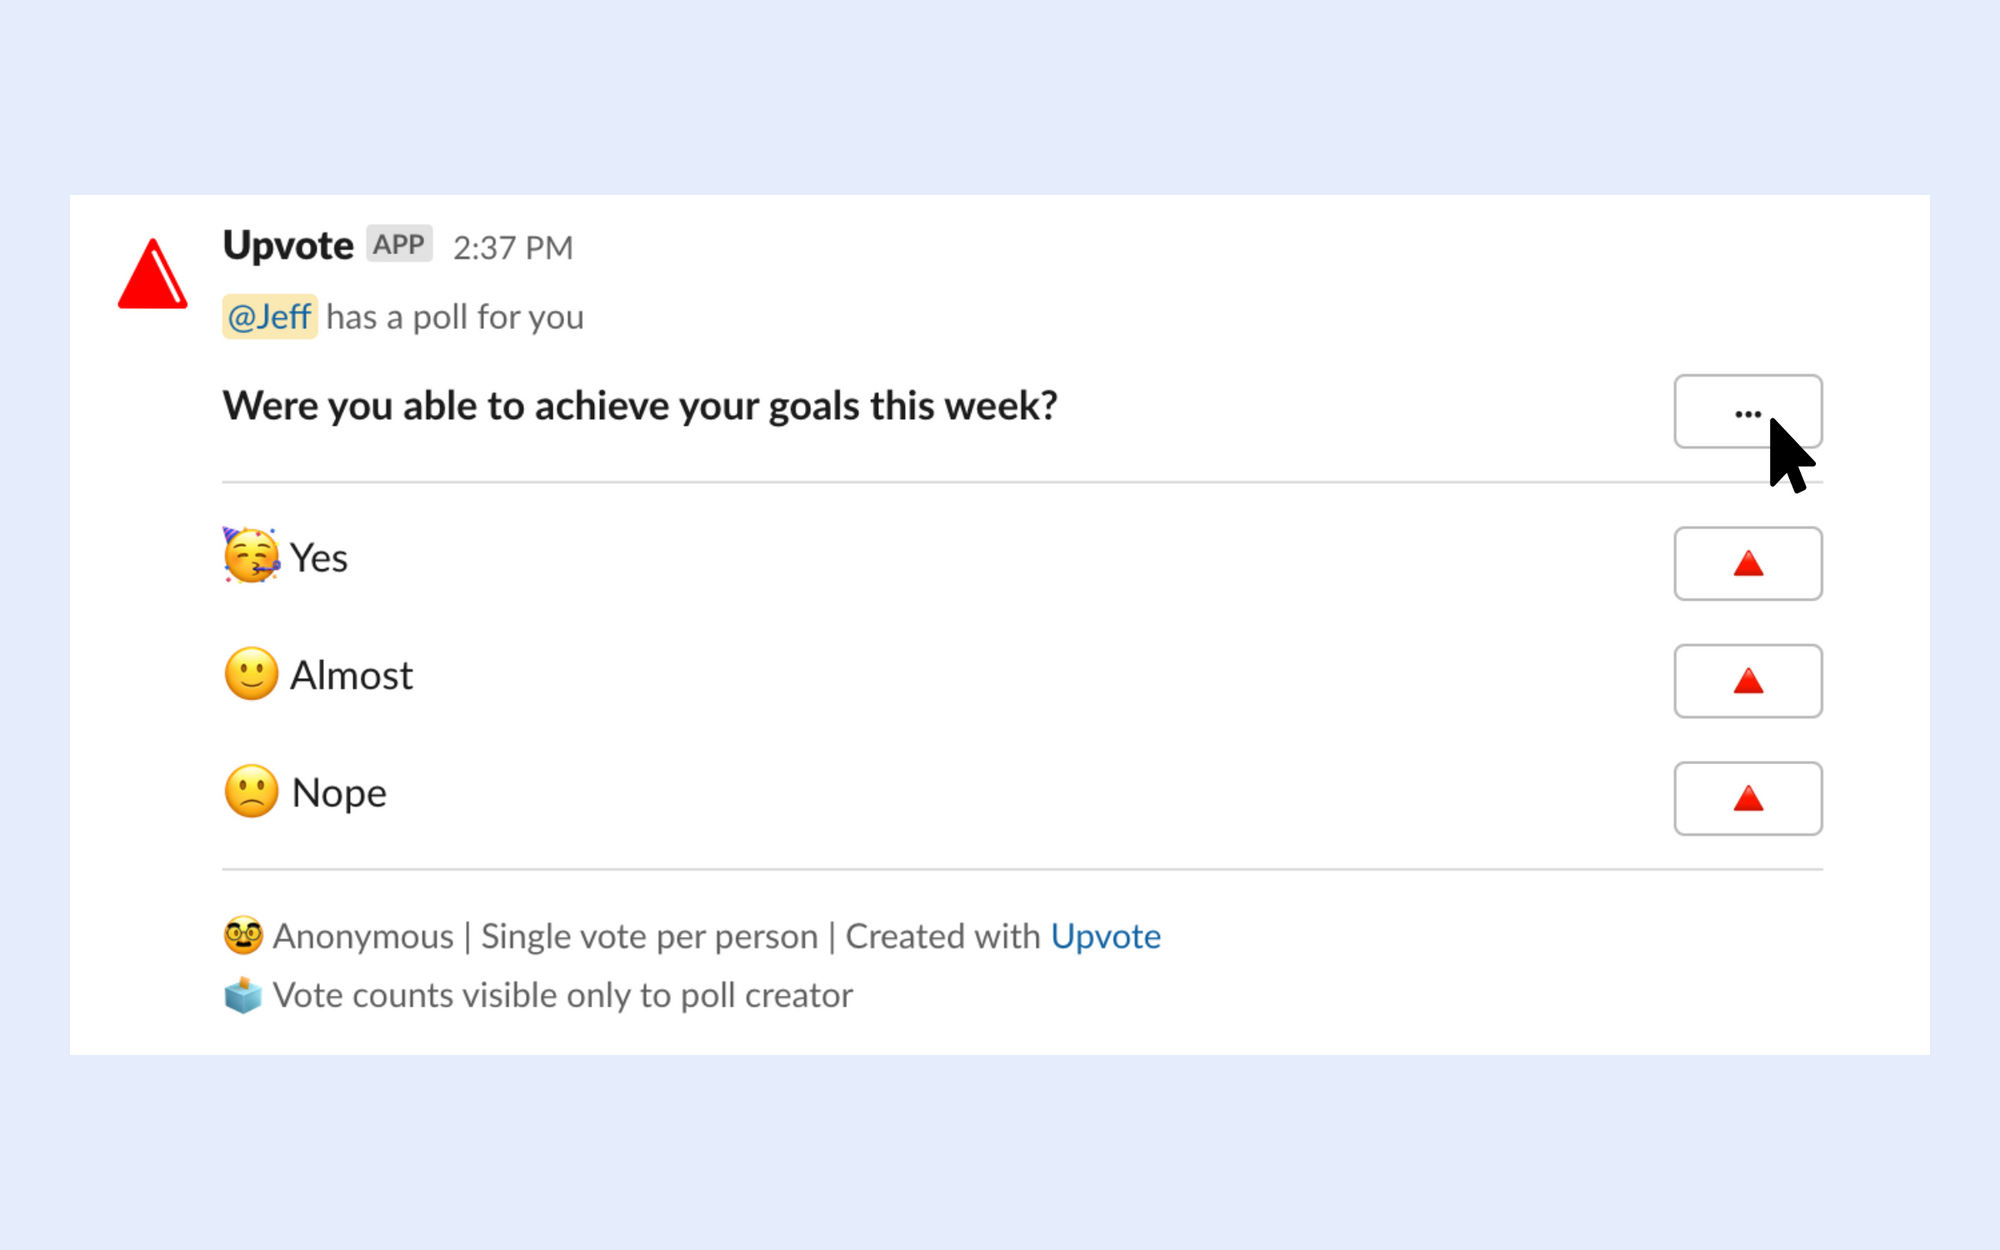
⚡️ Quick poll
Quick Poll is your classic poll with several options. Use Quick Polls to get instant decision or feedback.
You can make Quick Polls recurring and turn them into pulse polls. Then you can get regular feedback, analyze trends, present and act on insights.
Here's an example of a Quick Poll:
💡 Open Polls
Open Polls let you collect ideas, questions, meeting topics from your teammates.
One very common use case for Open Polls is to collect anonymous questions for an upcoming AMA/All Hands meeting.
Here's what an Open Poll looks like:

How to create a poll?
There are several ways to create polls with Upvote.
Whichever way you choose, you'll get a simple dialog where you enter:
- Poll question
- Channel where you want the poll shared
- Choices
- Options - Anonymous, Single vote per person, Change upvote icon
- Setup one-time or recurring schedule
Below are the several ways to create a new Upvote poll.
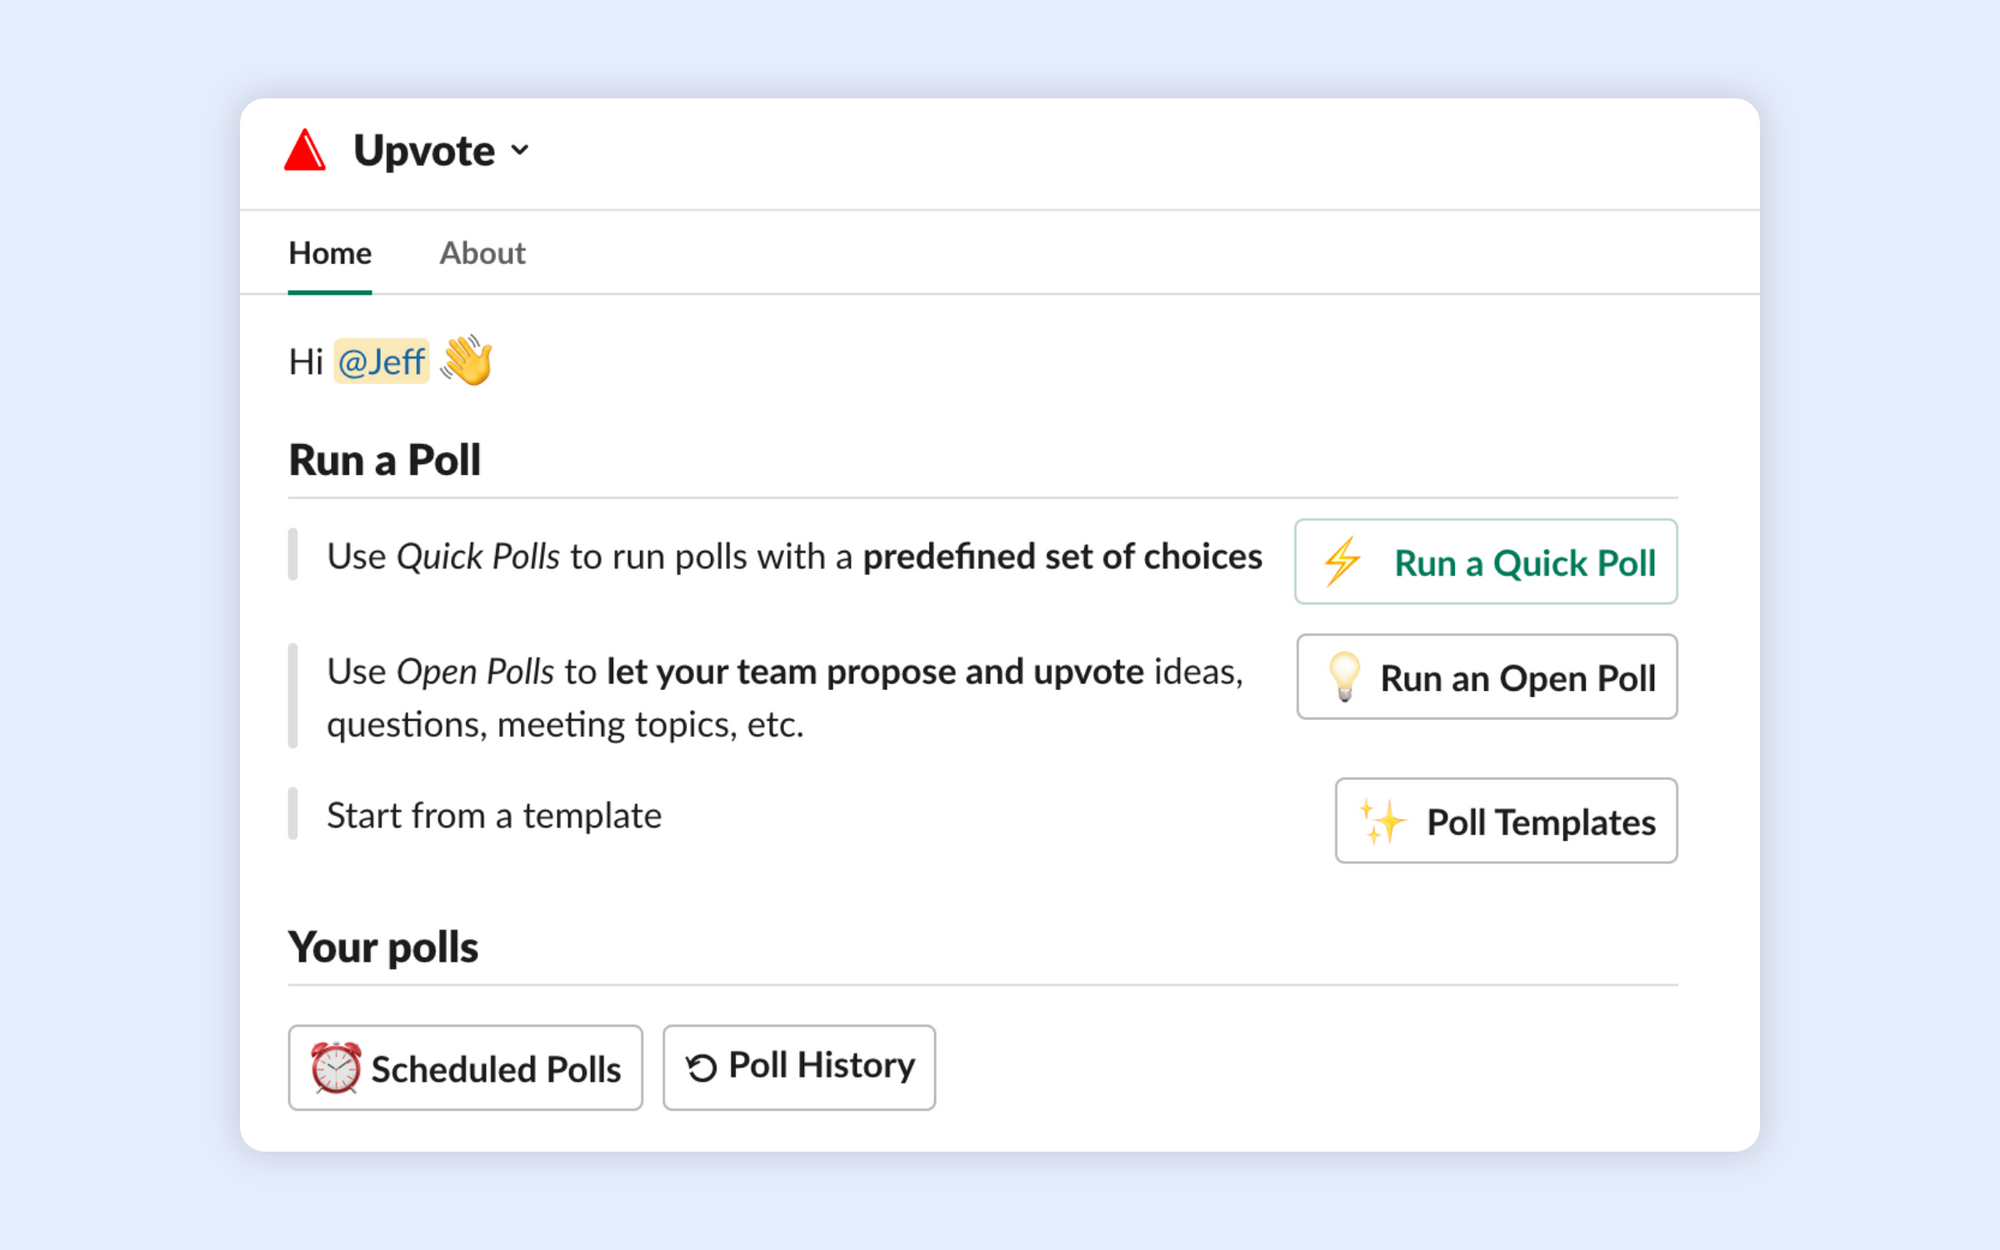
From the App Home
Upvote's App home is your main dashboard. Use it to run polls, access your scheduled polls, view recent polls and manage your settings.
Search for Upvote in Slack search bar to go to the app home page.
Your Upvote home page will look something like this:
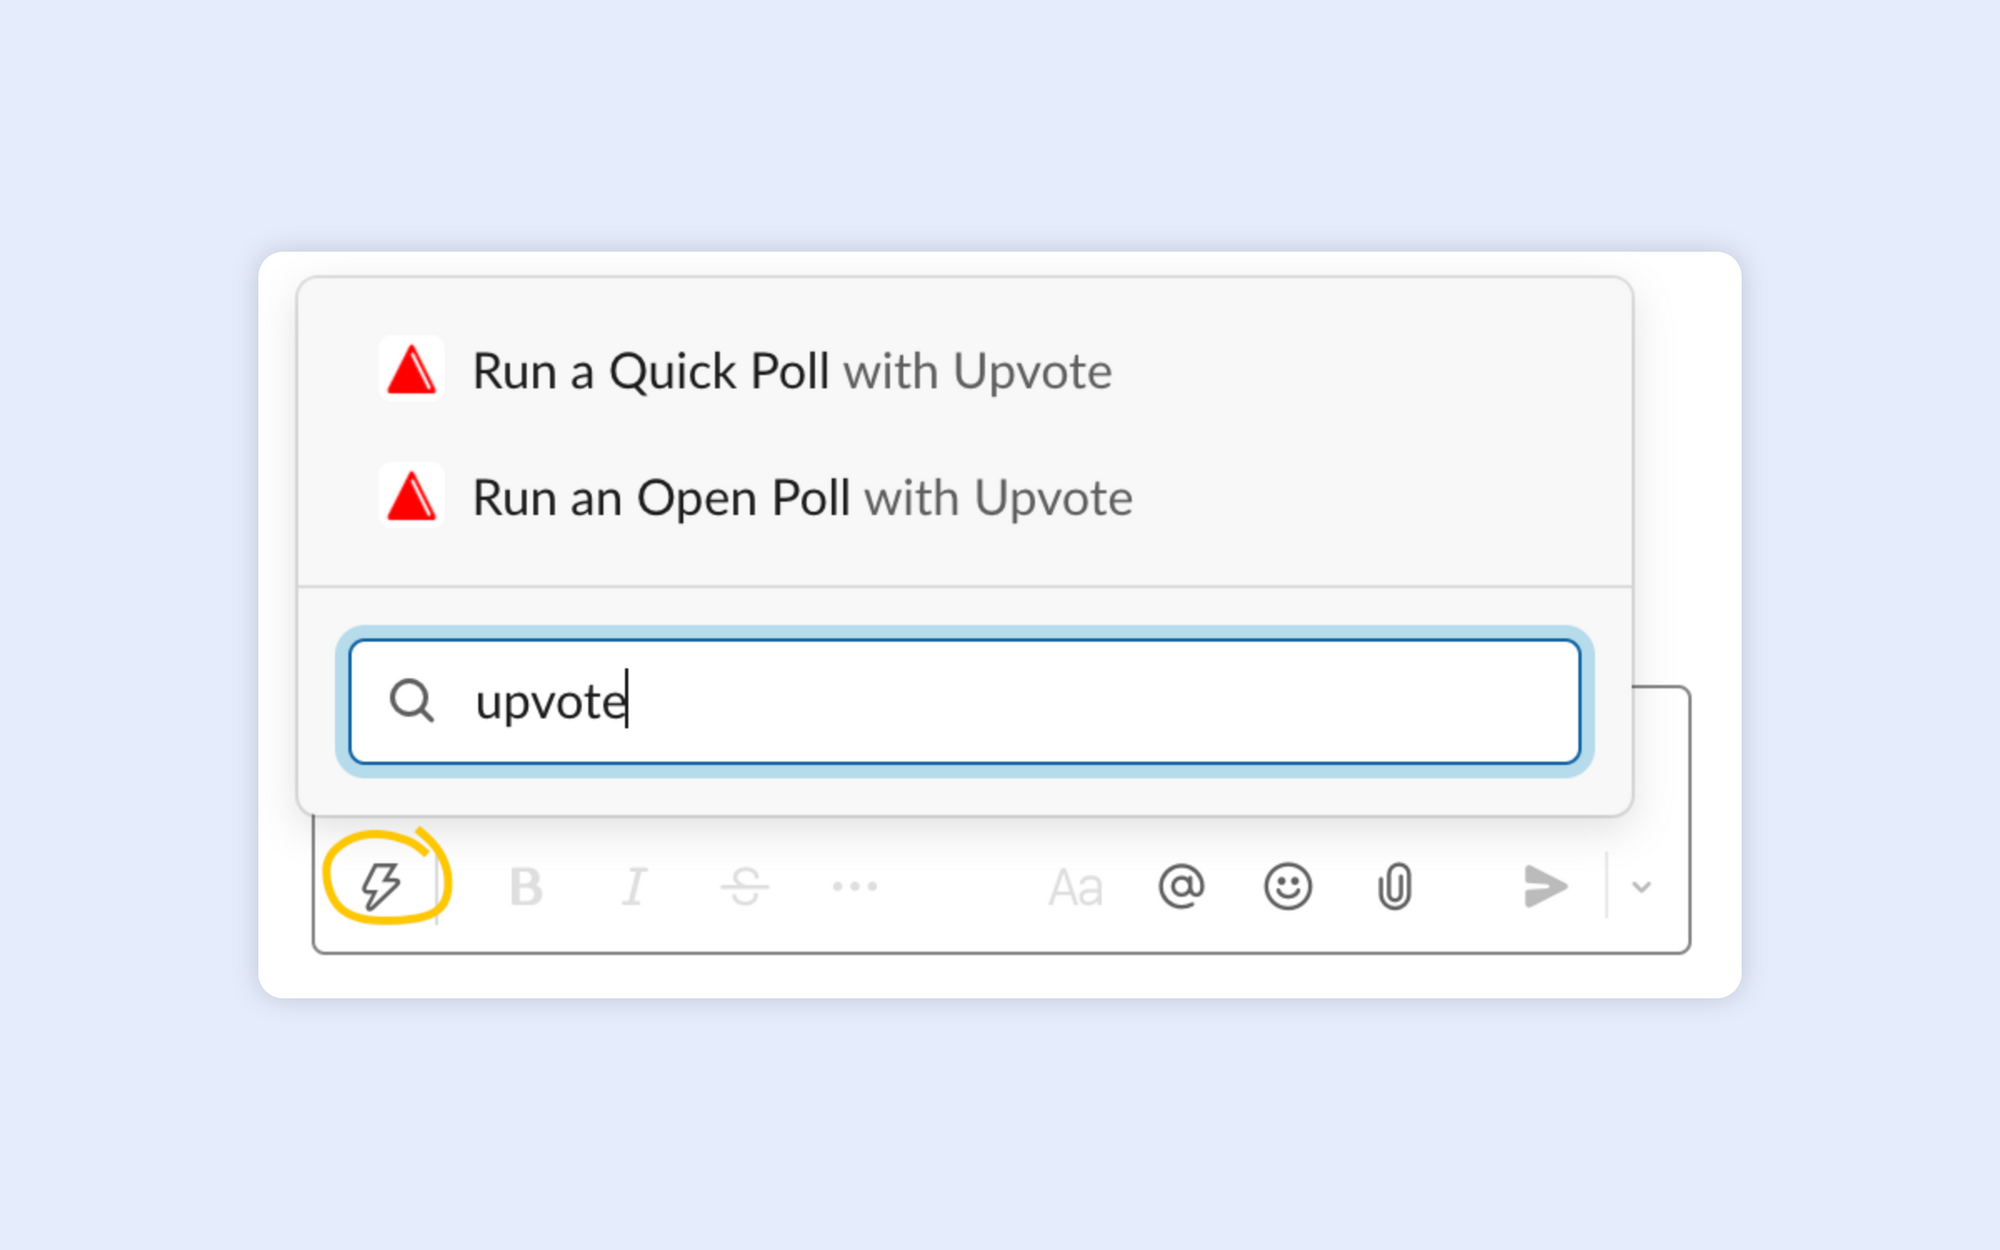
From Slack Shortcuts
You can also use the Slack shortcuts menu in any channel.
Using Slash commands
Alternatively, you can use the /upvote slash commands.
/upvote poll - Create a Quick poll ⚡️
/upvote open - Create an Open poll 💡
Poll Setup Dialog
When you decide which type of poll you're creating and begin with any of the methods above, you will get a dialog where you'll setup your poll.
Quick Polls
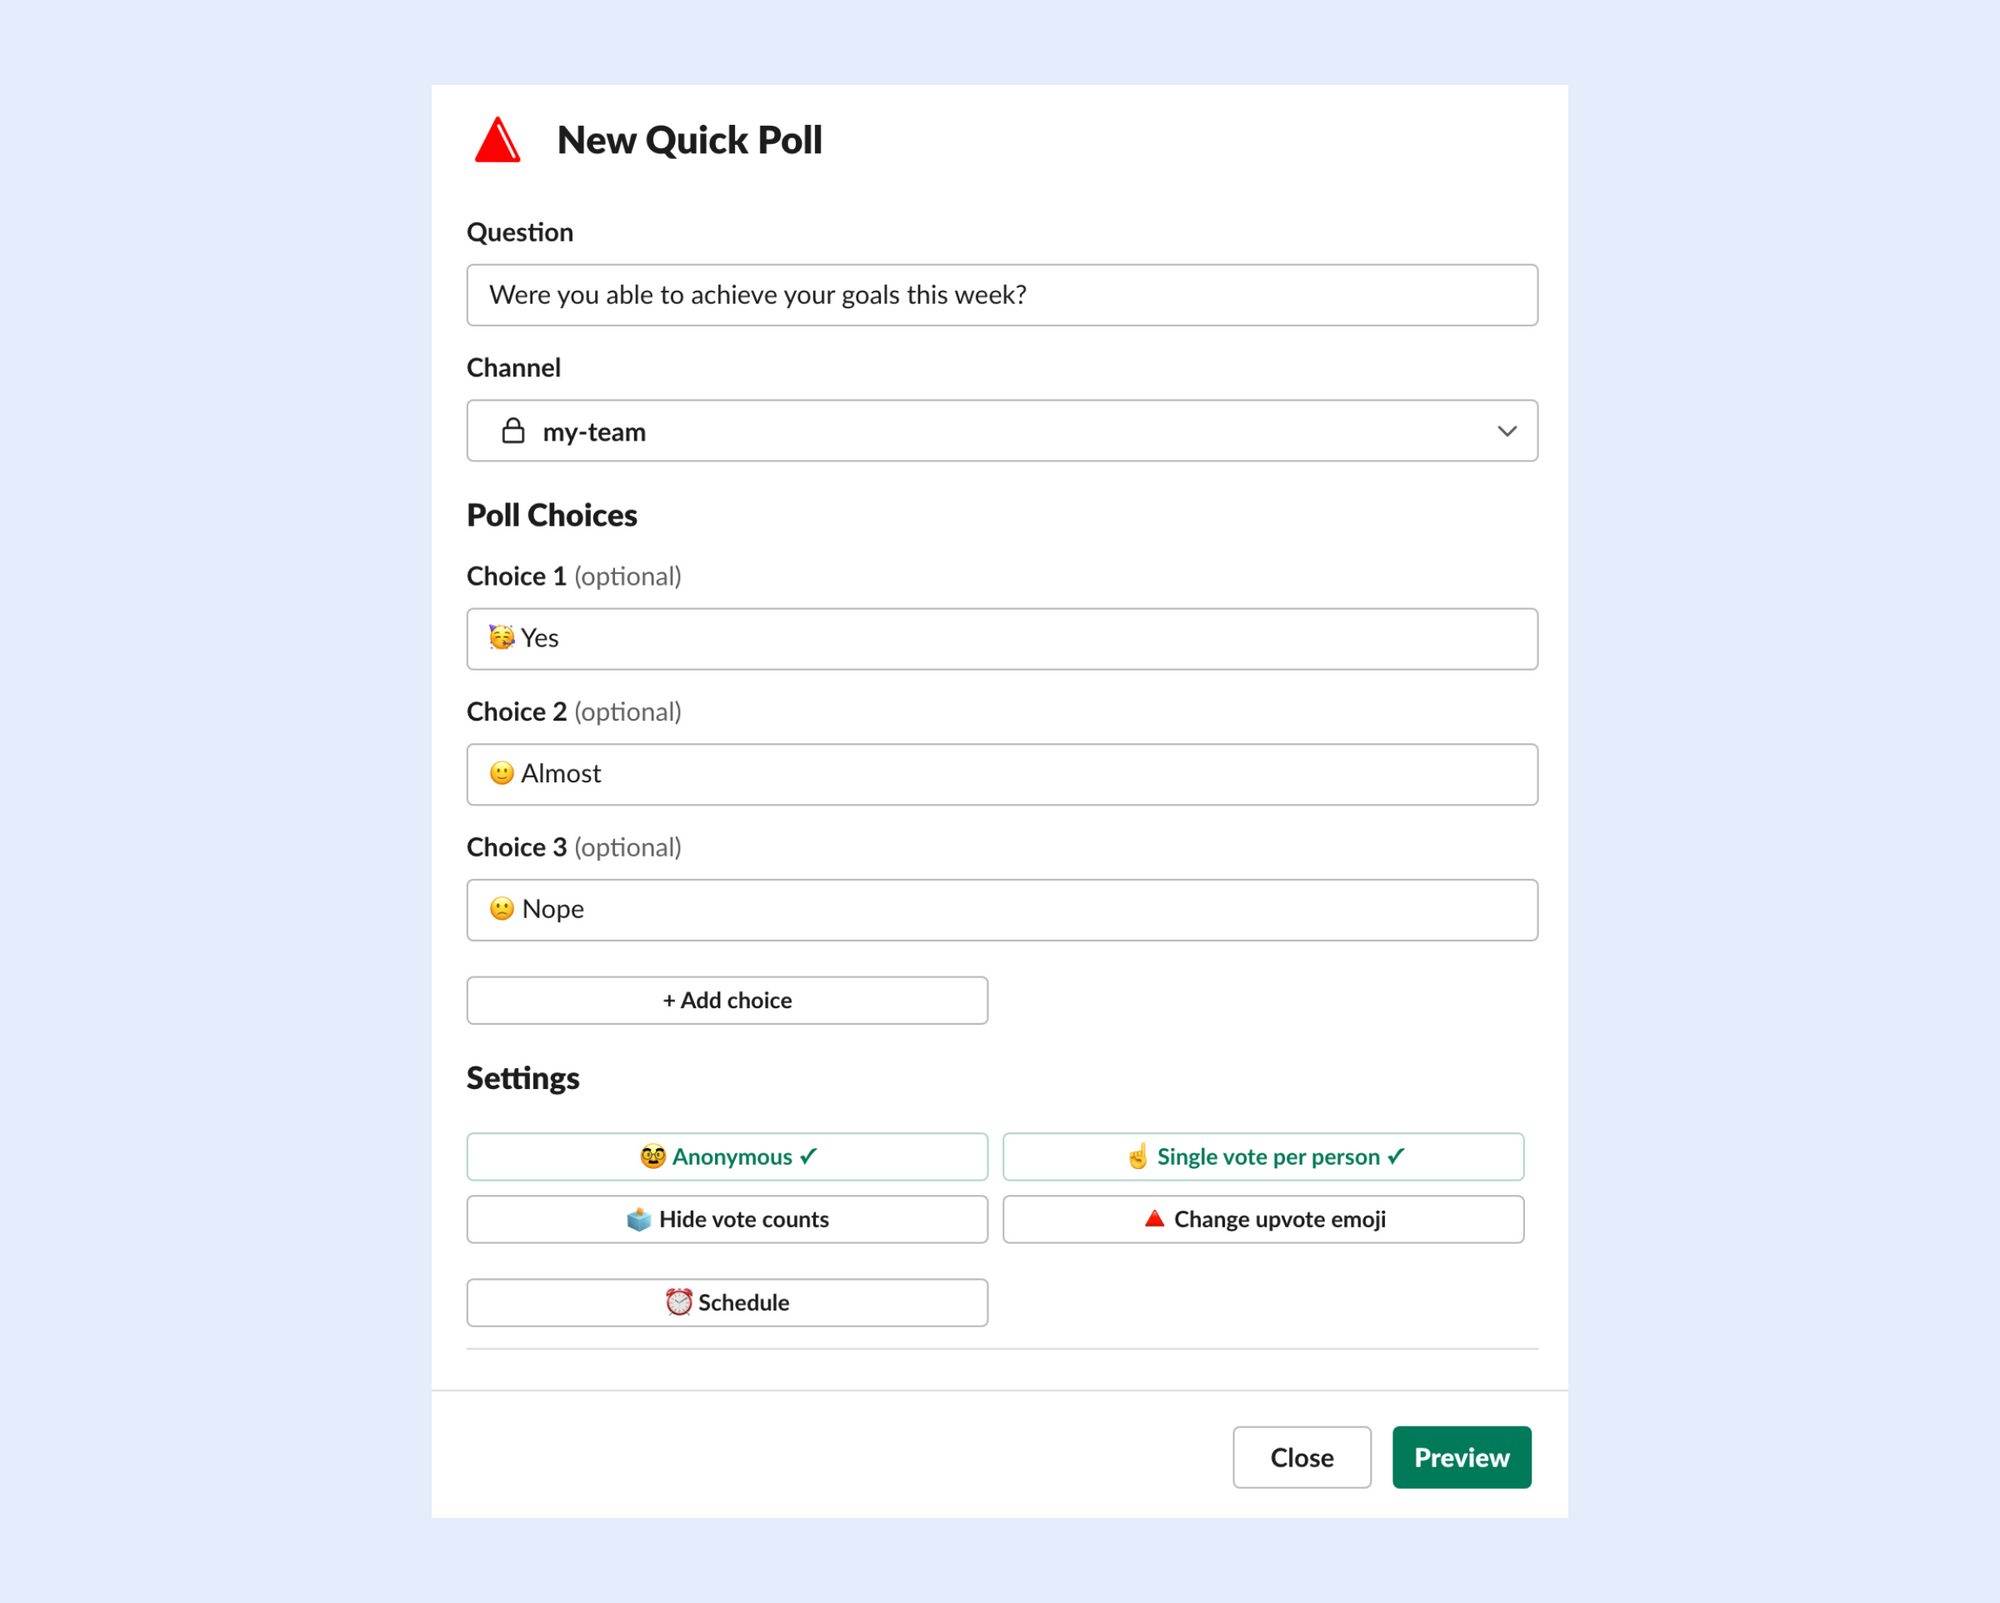
For a Quick poll you'll need to enter:
- Poll question - what is the poll about?
- Channel - where to send the poll?
- Poll choices
- Settings and schedule (both optional)
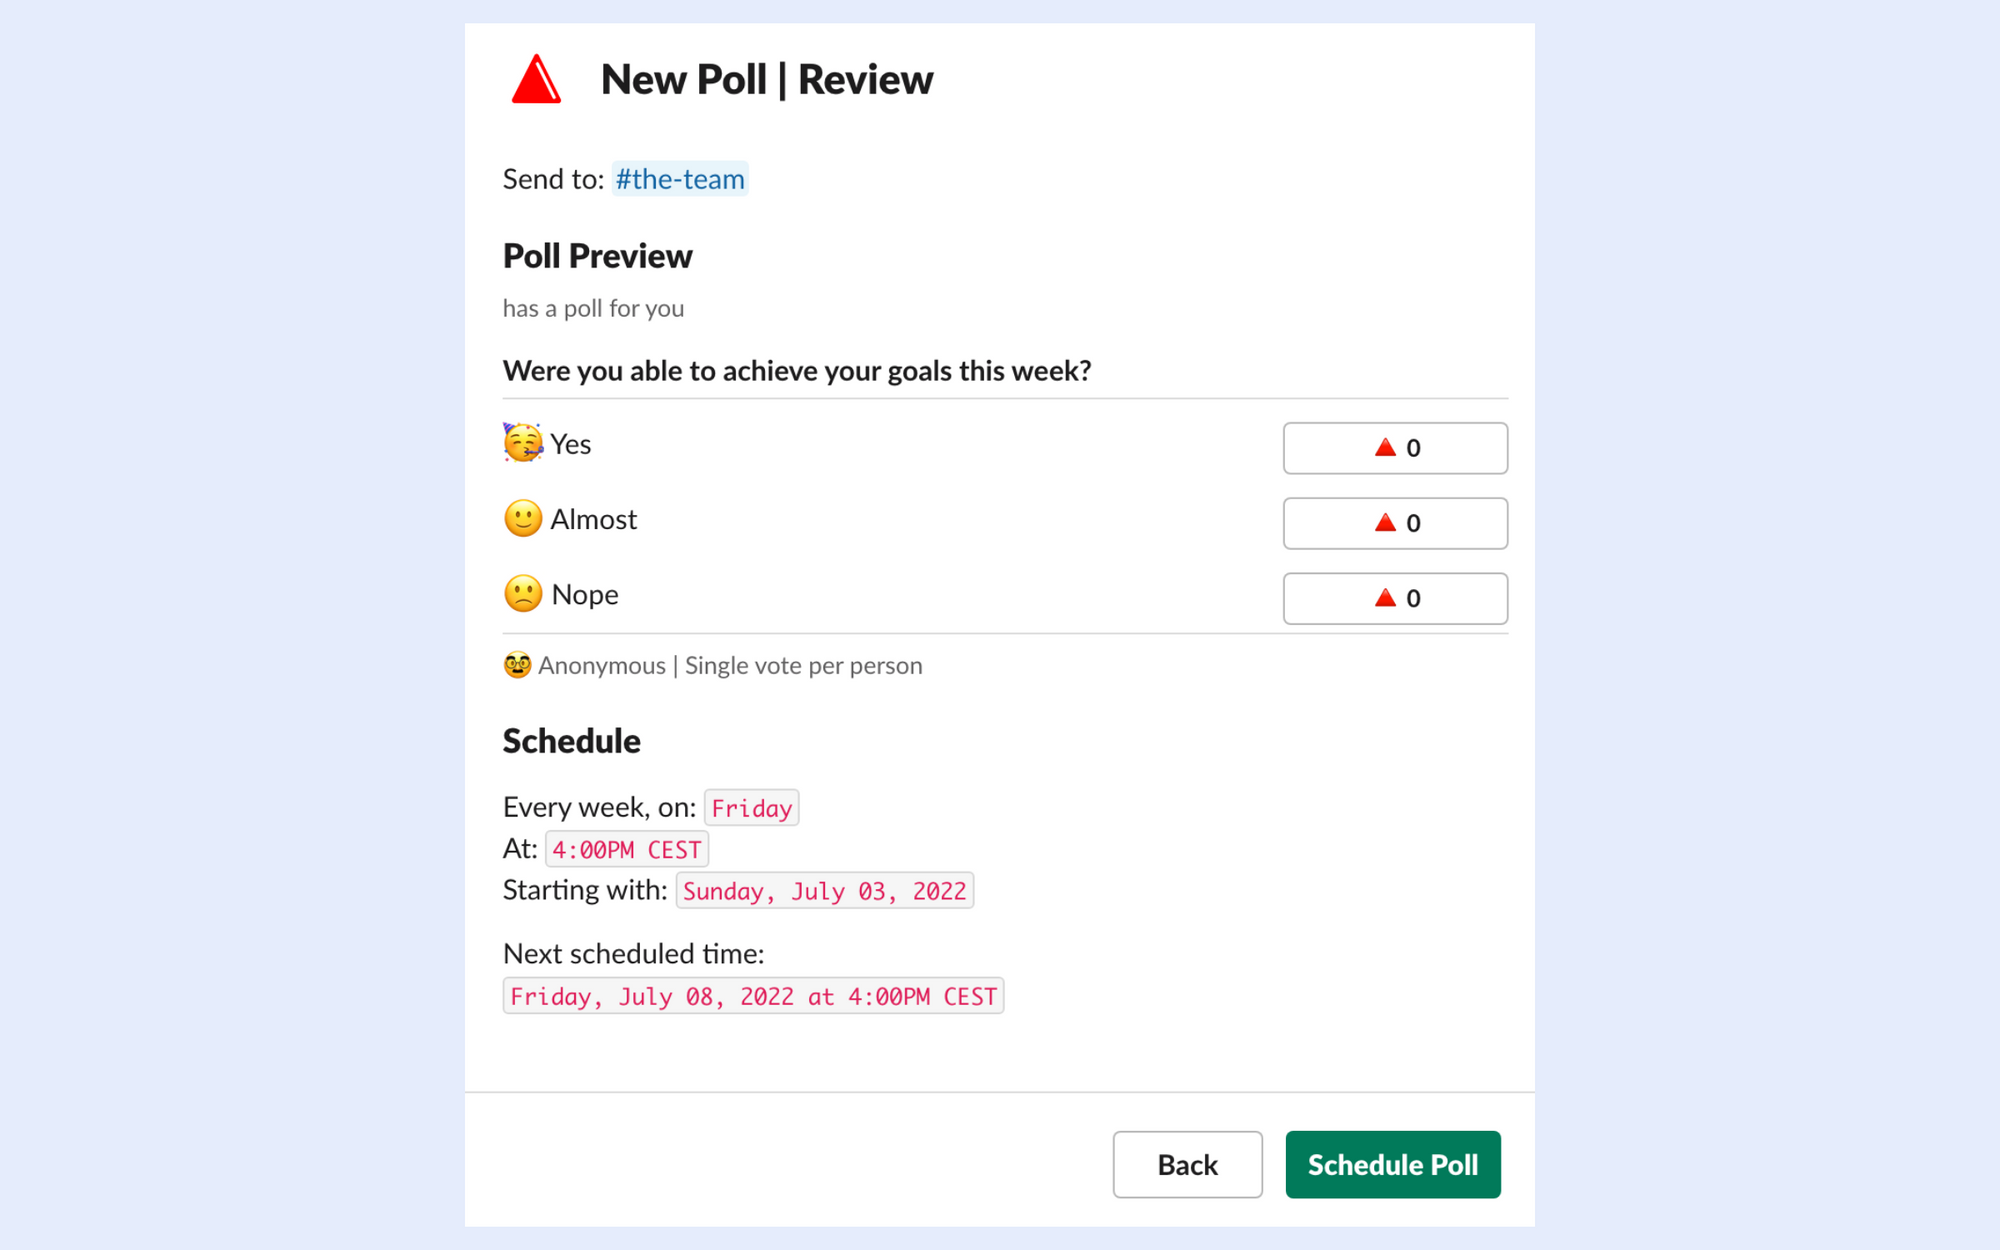
Clicking Preview takes you to the next step where you can review your poll before sending (or optionally scheduling it):
Open Polls
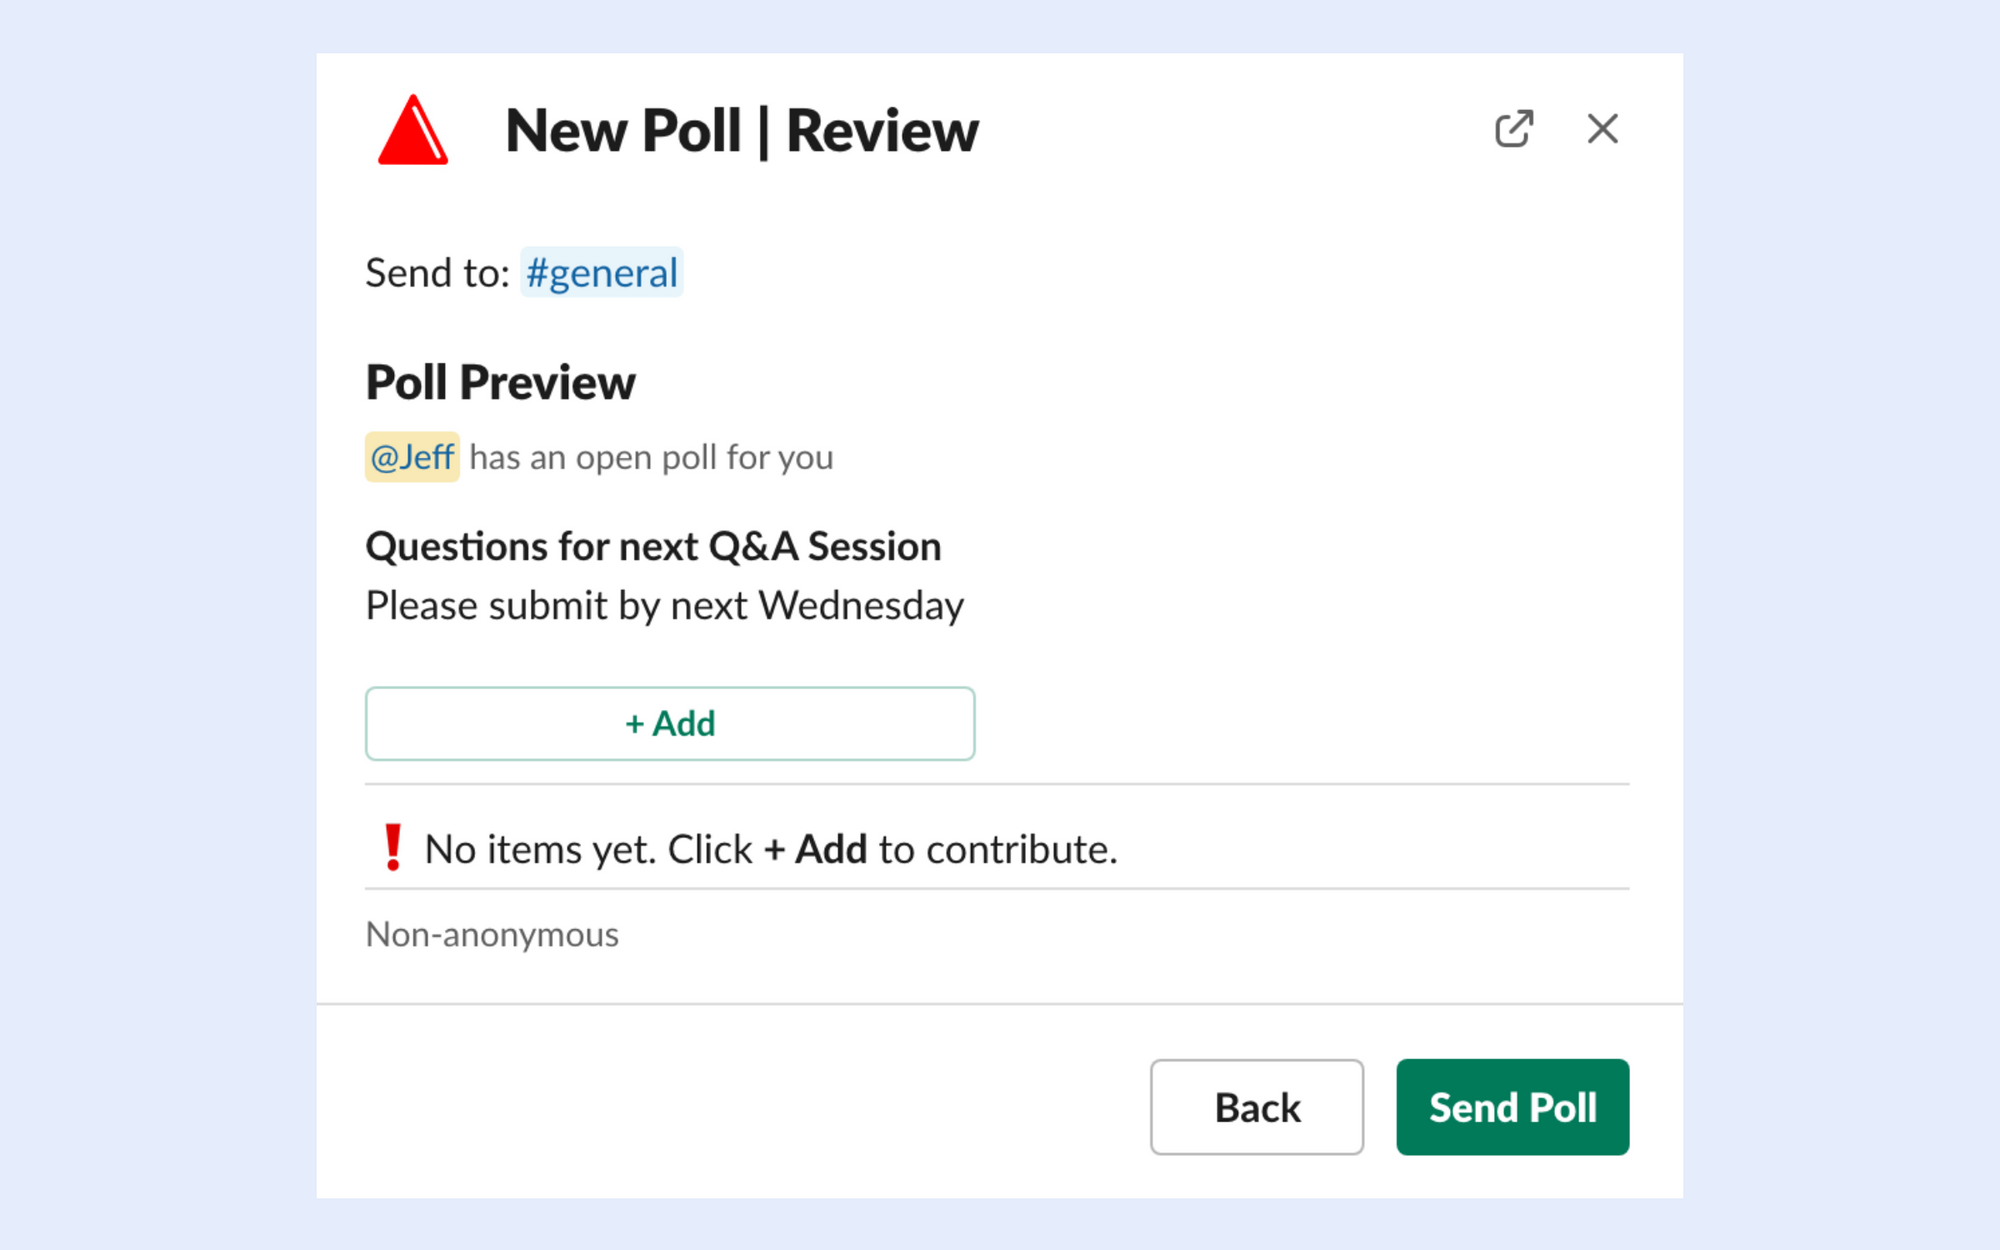
For Open Polls, you'll enter the same elements except for poll options. With Open Polls, you start empty and the audience contributes their proposals.
The preview dialog for an Open Poll will look something like this:
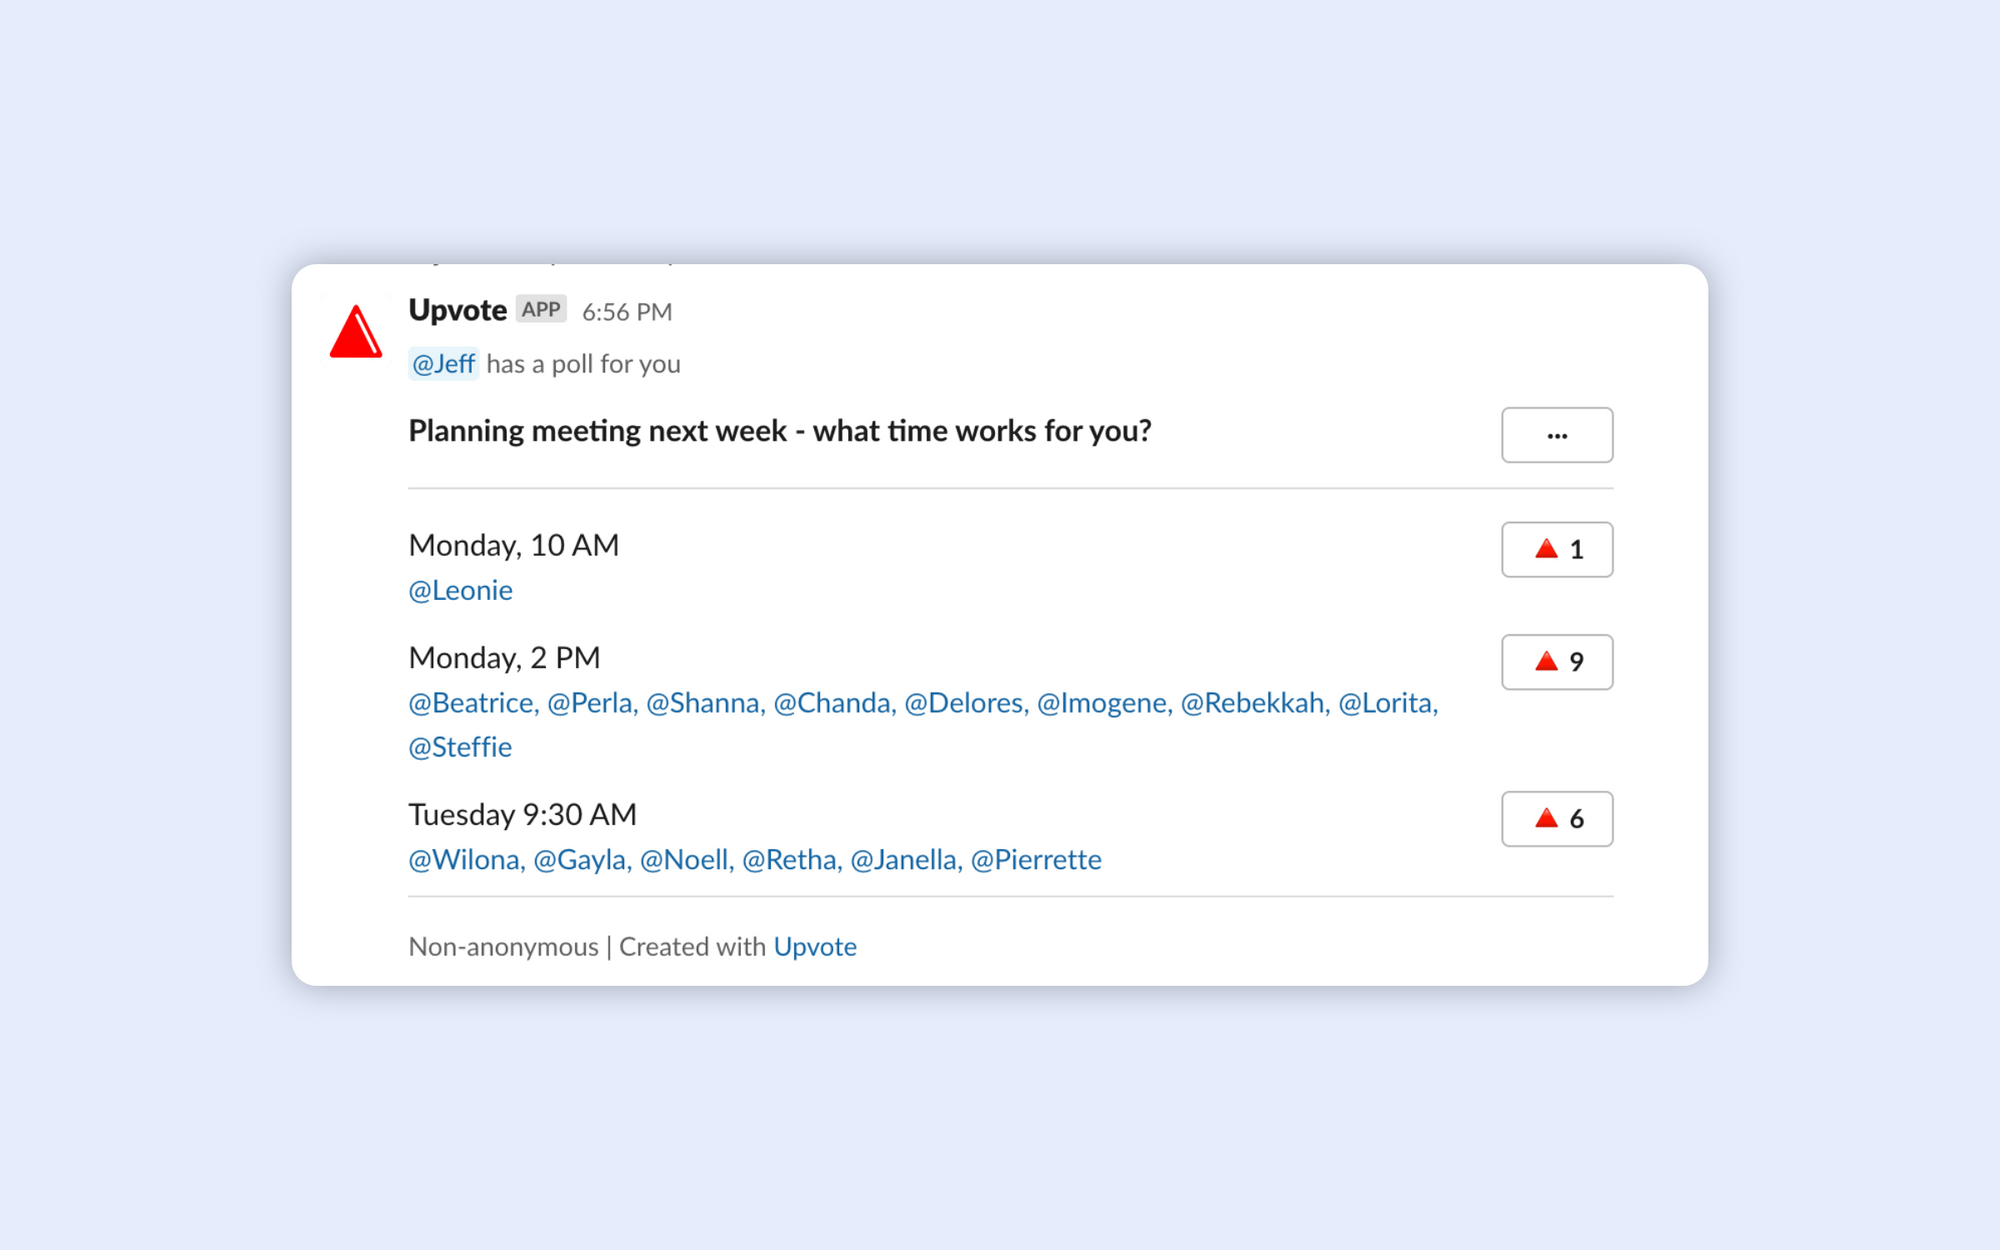
Recurring Polls - How to schedule a poll?
While creating a new poll, at the bottom of the new poll dialog, you'll find a Schedule ⏰ button.

Click the button, and you'll get the form where you enter schedule settings.
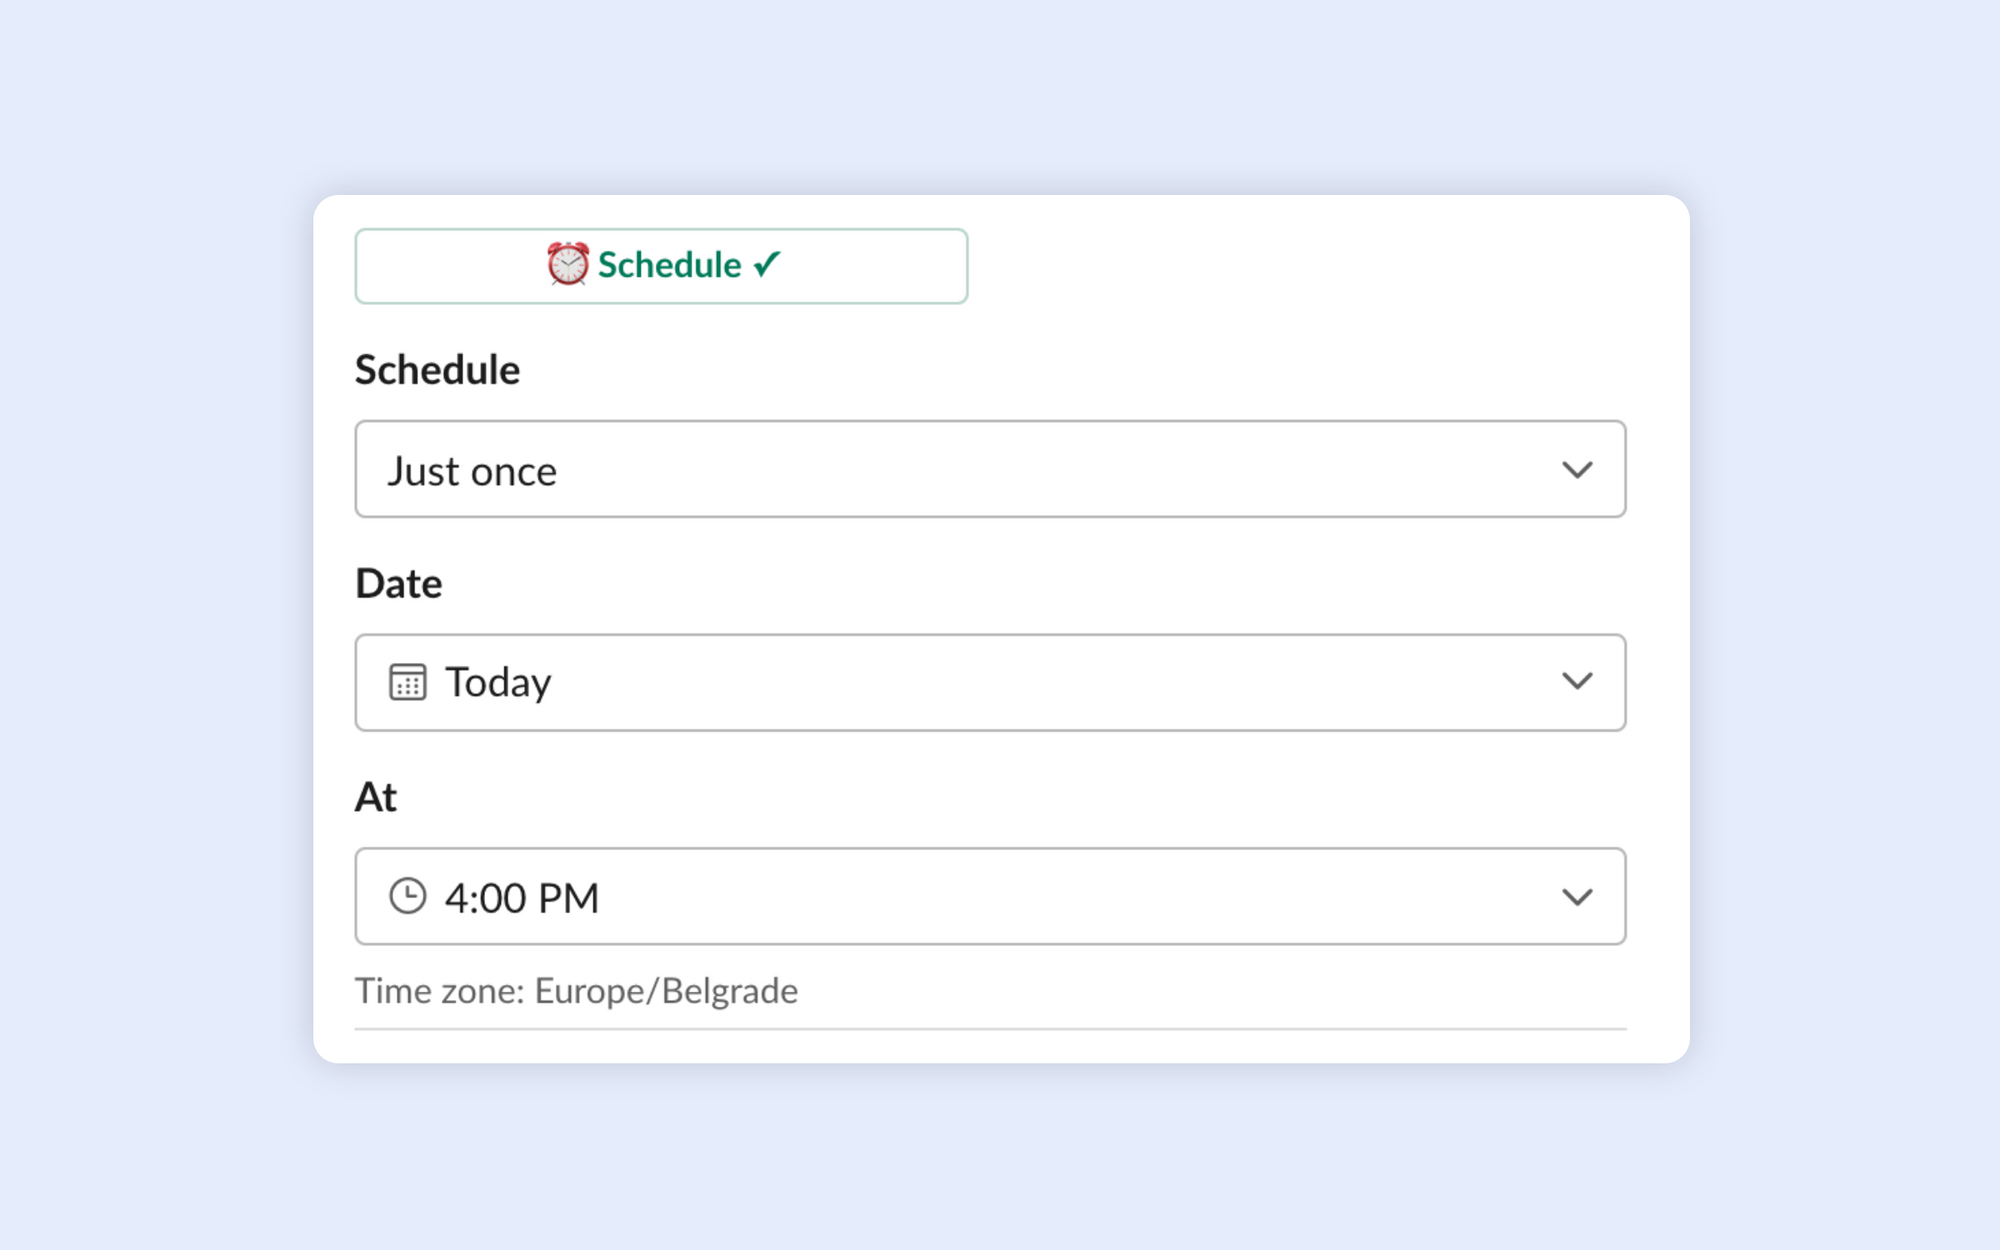
You can choose from several schedule types:
- Just Once - setup the poll now, send it later
- Weekly - send the poll every week, on days you choose
- Every 2, 3, 4 weeks
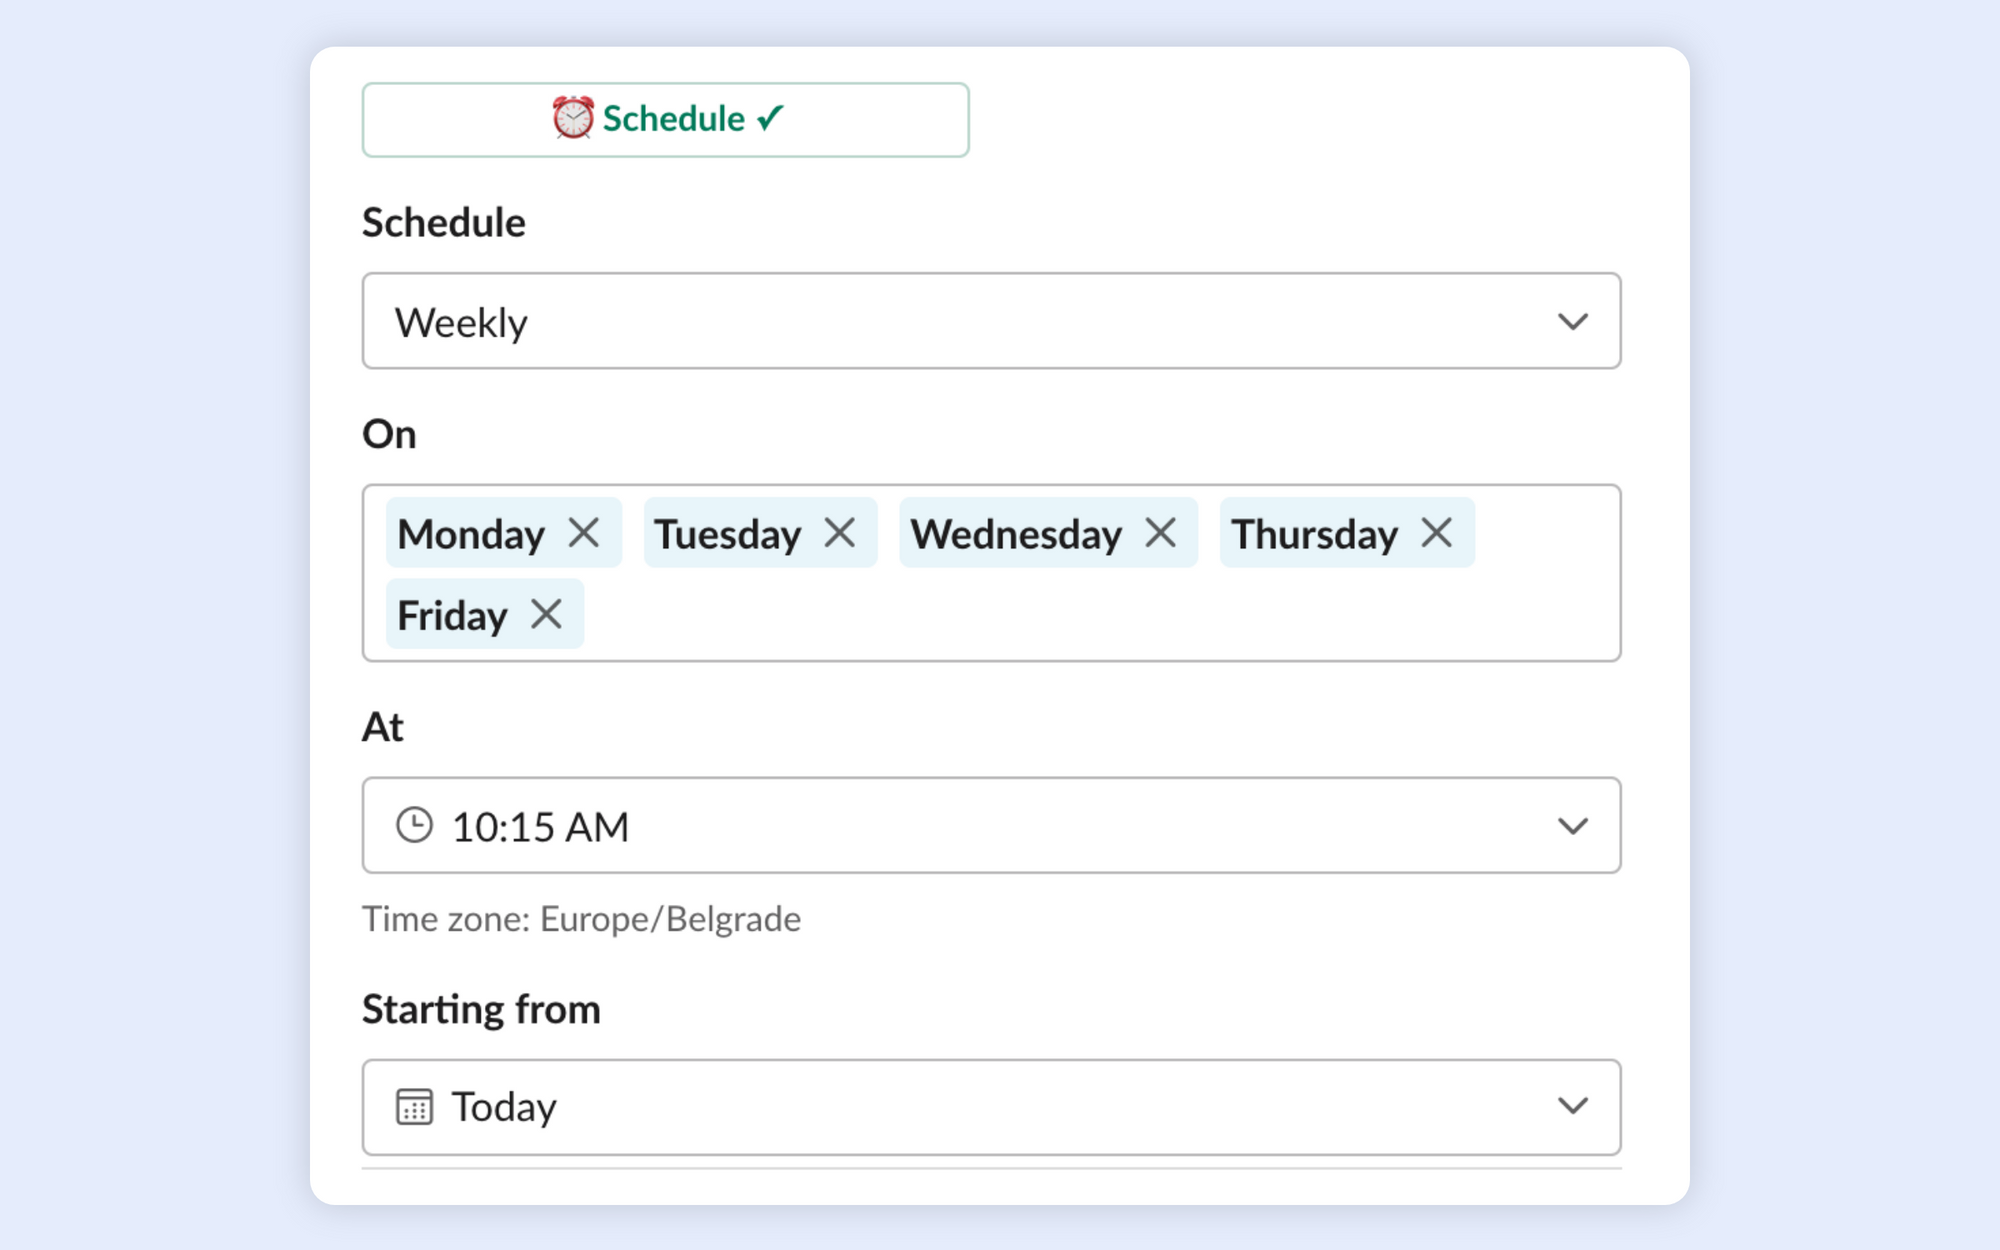
How to schedule a daily poll?
- Select Weekly schedule type
- Select days of the week when you want to send the poll
- Select time of day (hint: You can also type in the exact hour and minute of the day)
- Starting from date is the first date to be considered for sending. This works together with day of week to determine the days when your poll is sent.
Below is an example of a schedule sending every weekday at 10:15AM.
How to schedule a recurring poll and send it immediately as well?
Say you want to schedule a poll to run periodically, but need to send one right now. Here's how you can do that.
You'll first create and send a poll, then add the schedule to that poll.
- Create the poll and send it without setting up a schedule
- Go to your poll in the channel where it was sent
- Click the poll settings button [···] to bring up the Poll Settings dialog

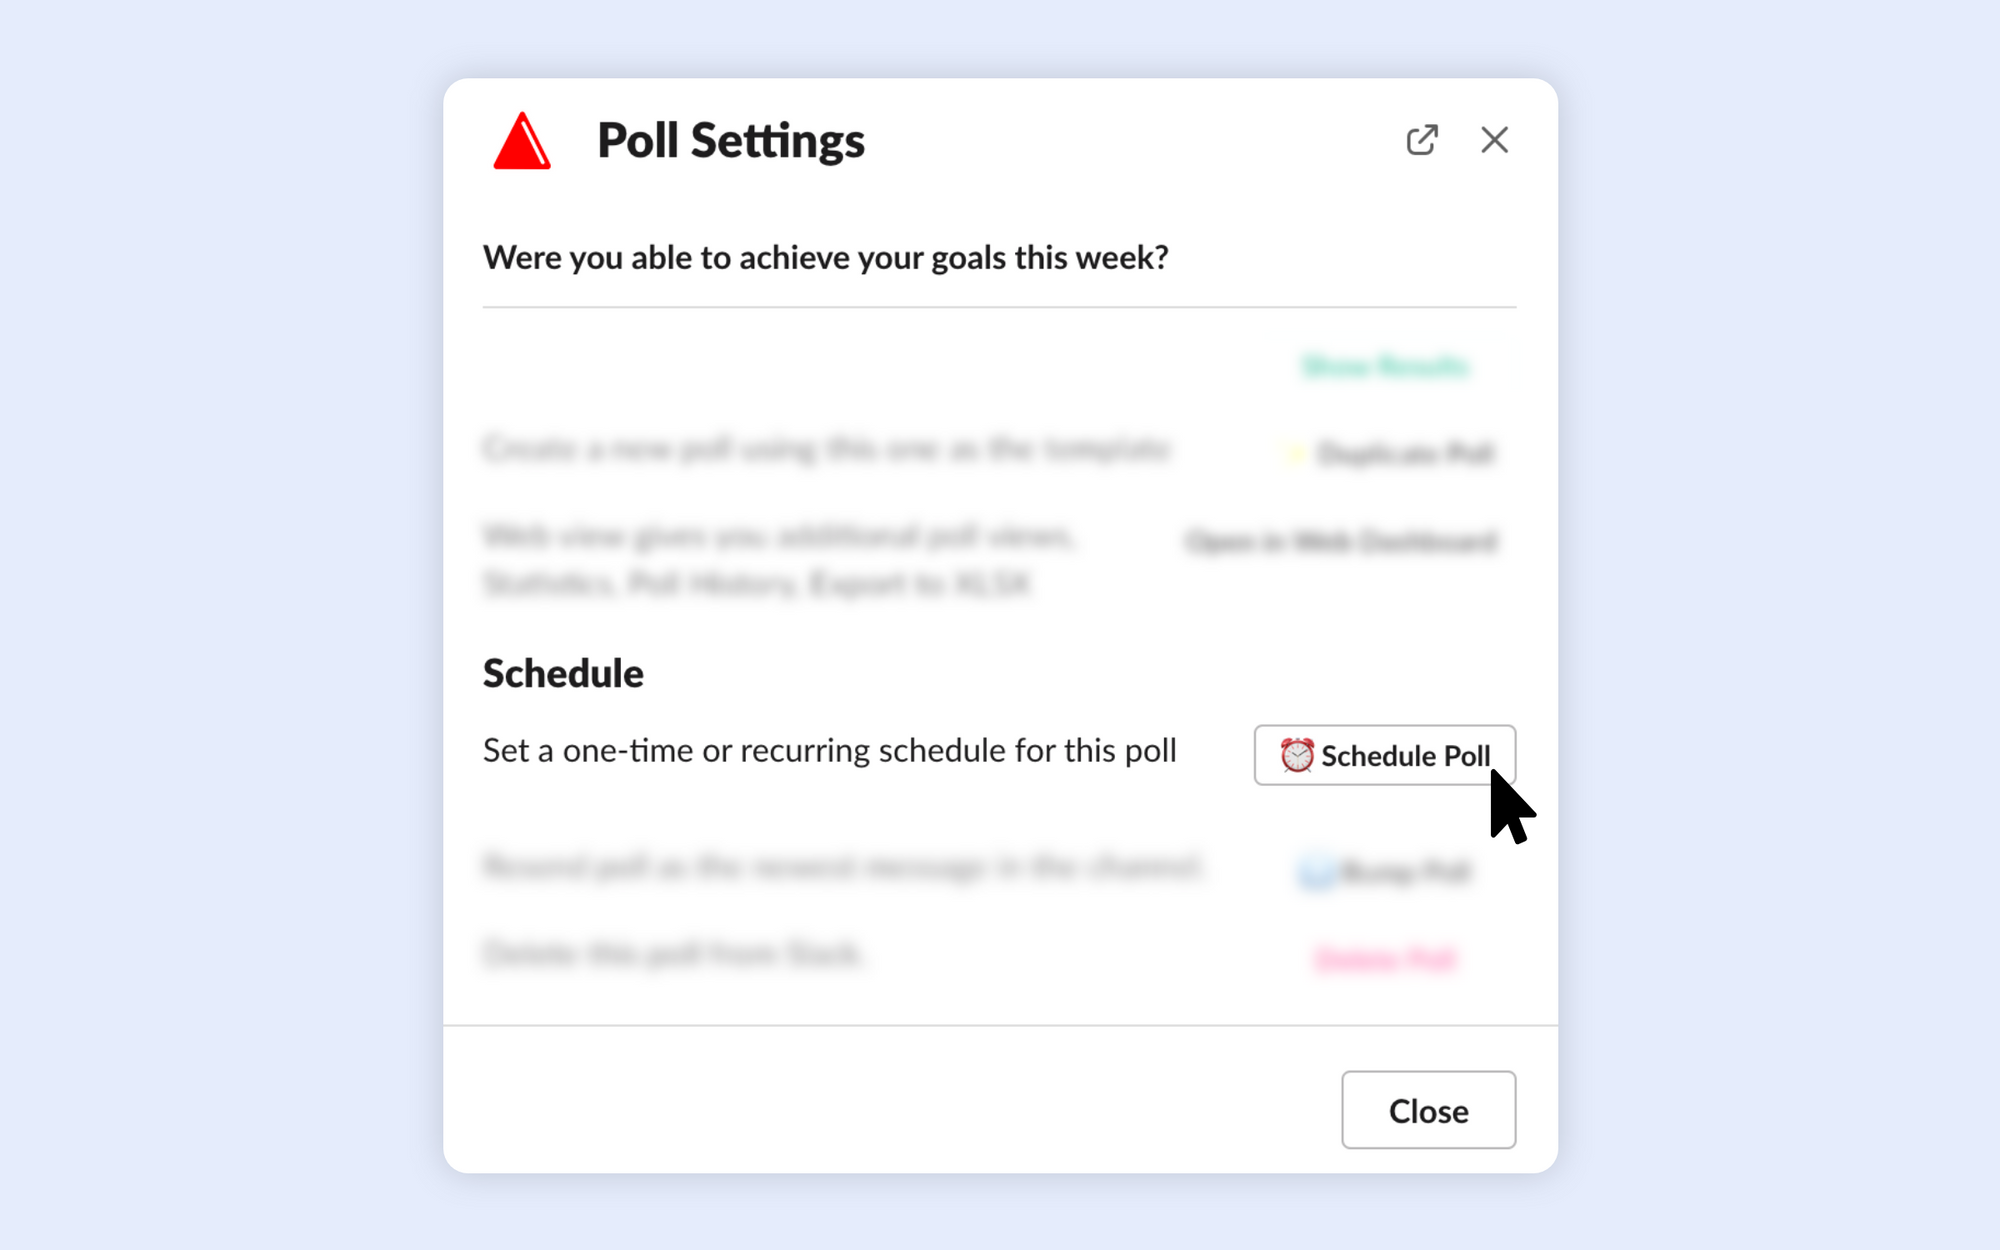
4. Click ⏰ Schedule Poll and enter your schedule settings
5. Click Submit to save the schedule
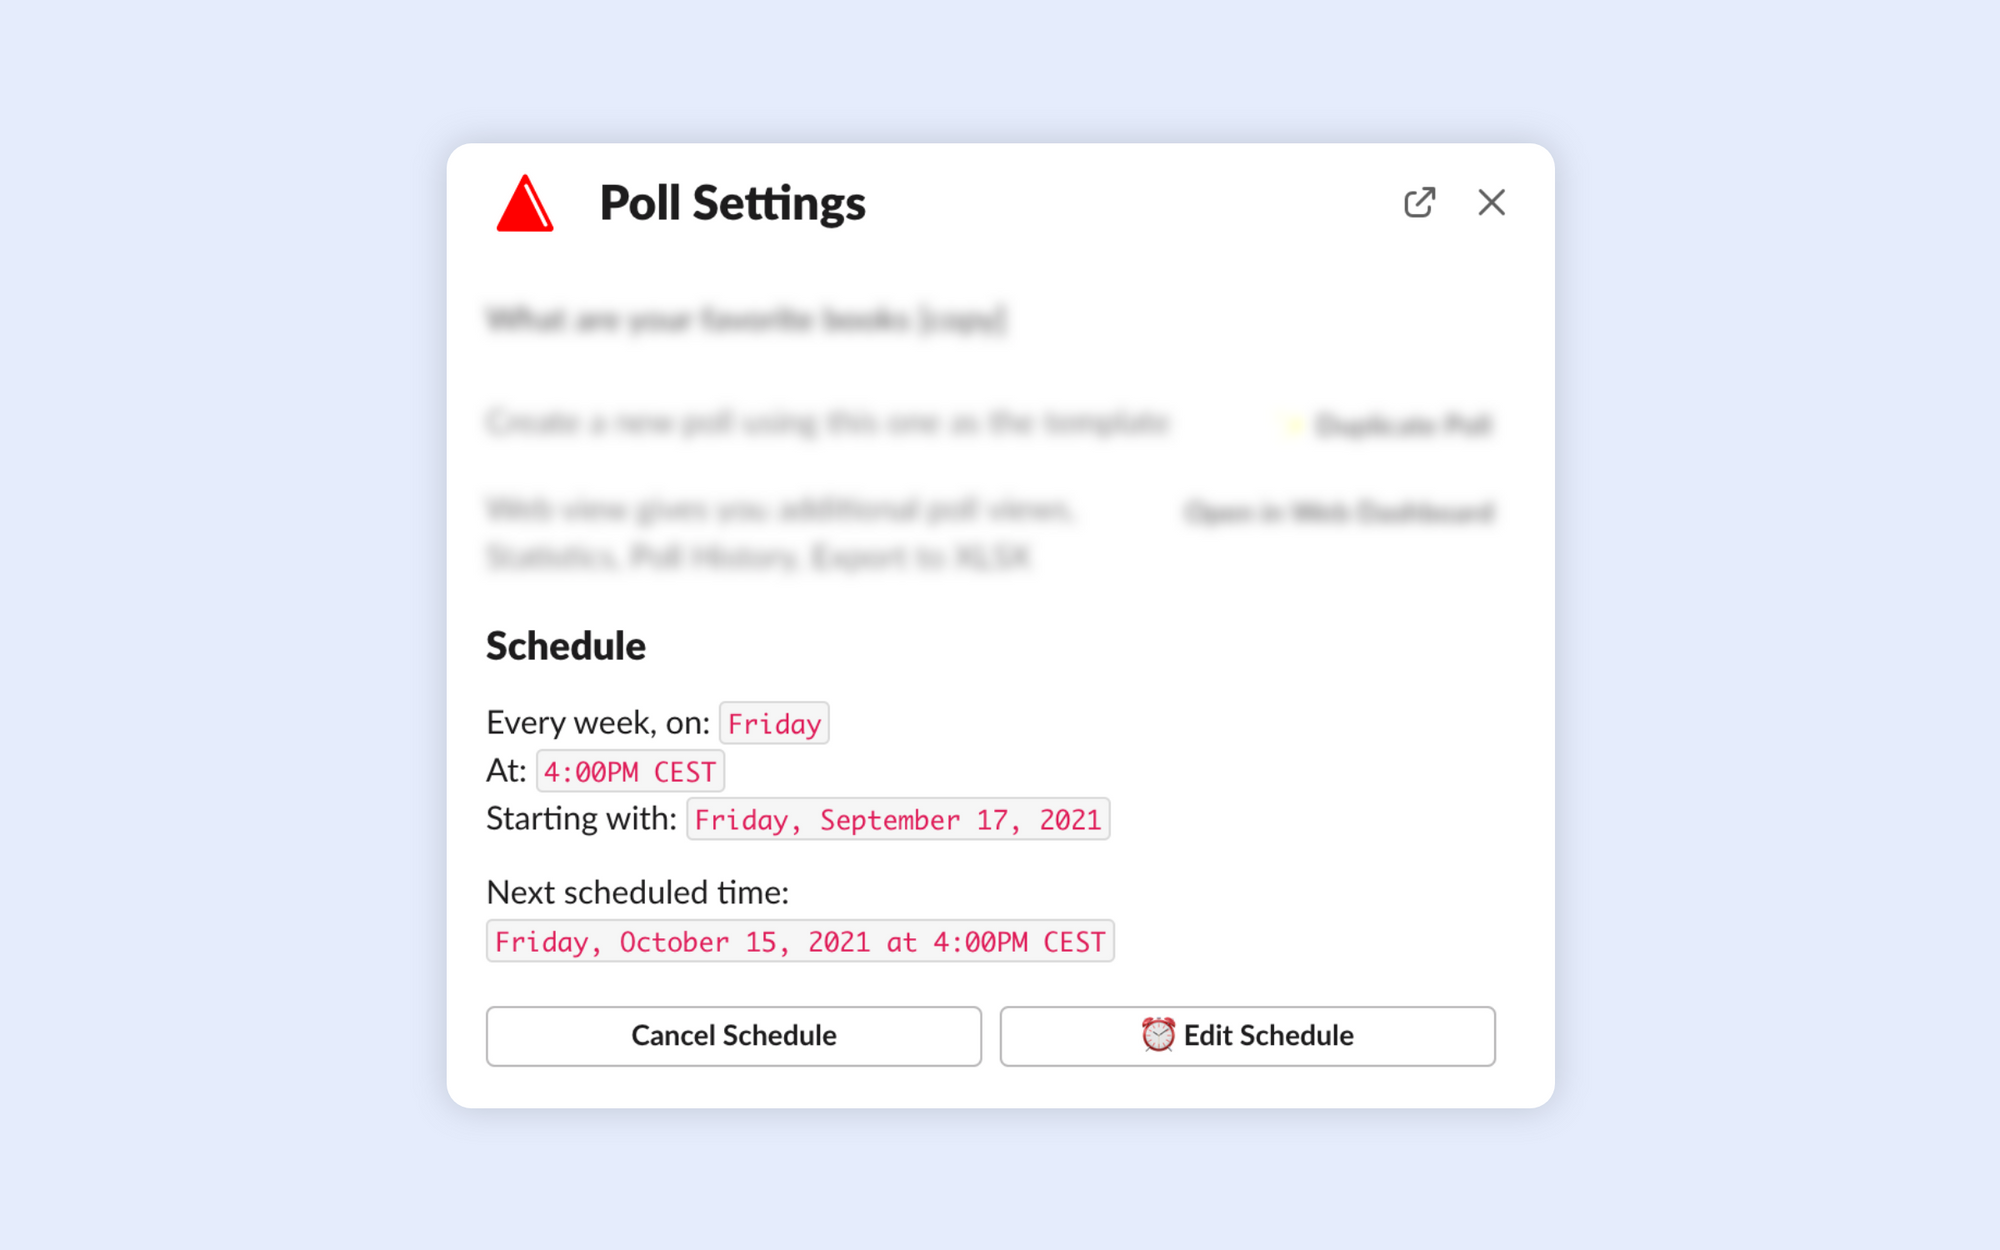
How do I cancel or edit schedule for a poll?
- Find your poll in a channel where it was sent or click ⏰ Scheduled Polls in Upvote App Home
- Click the poll settings button [···] to bring up the Poll Settings dialog
3. Use Cancel Schedule or ⏰ Edit Schedule to perform your desired action
What timezone is used when scheduling polls?
When entering time of day for poll schedules, your current Slack time zone is used. If you're not sure, don't worry - the time zone will be written below the time input field.
Poll Settings
When creating a new poll, you have several settings available. They will be shown towards the bottom of the New Poll dialog. Click on any of the buttons to toggle the option.
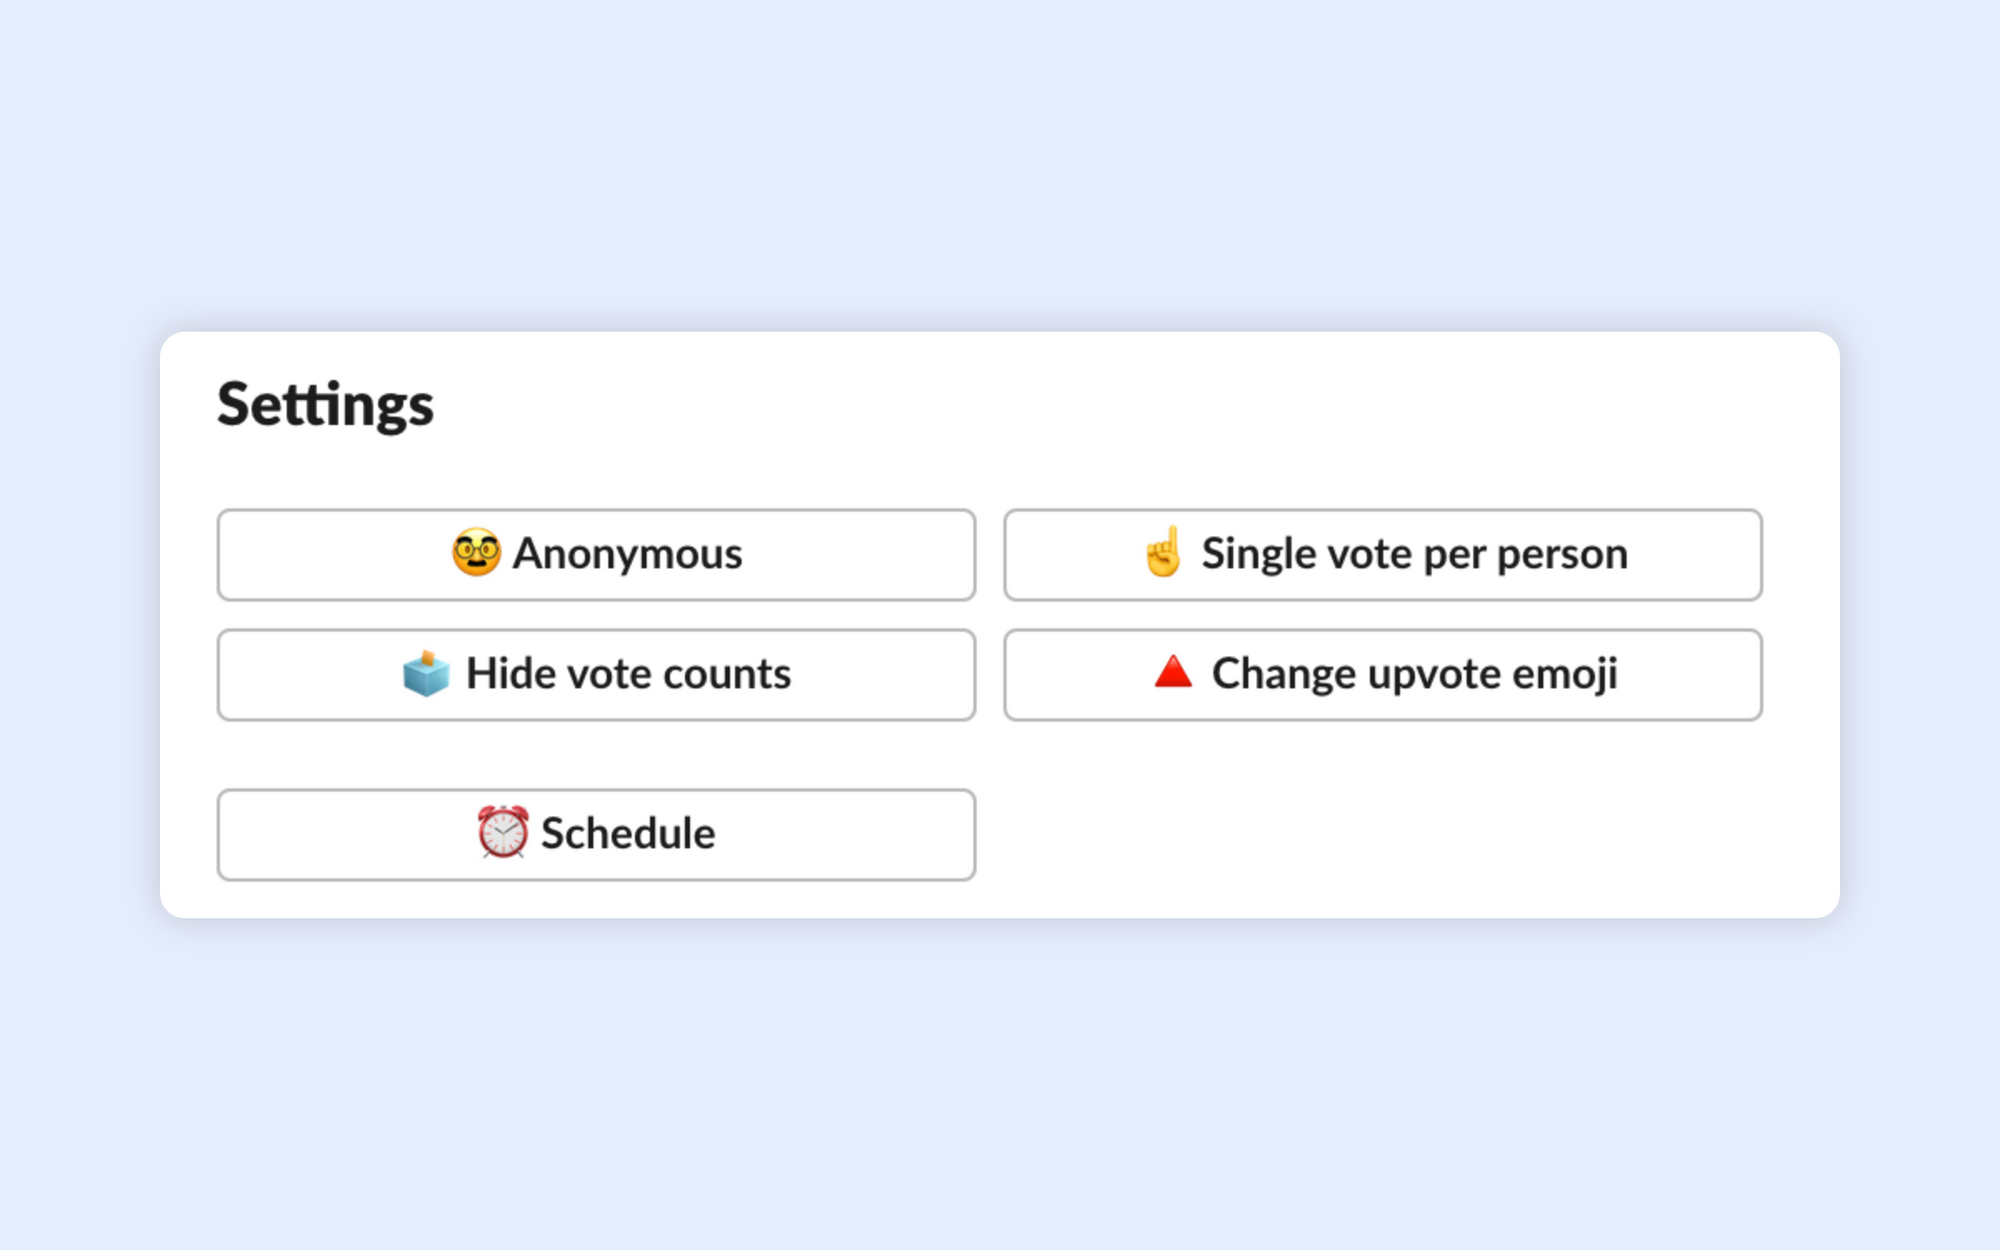
🥸 Anonymous
When you create an anonymous poll, nobody (including poll creator) can see the identity of voters.
For Open Polls, creators of submitted items will be anonymous as well.
☝️ Single vote per person
Use this option when you want to limit the number of votes a single responder can send.
By default, all polls are multi-vote, meaning anyone can vote for multiple options.
🗳 Hide vote counts
By default, the number of votes is shown next to the upvote icon for each poll choice.
You may want to keep the vote counts hidden from poll participants to avoid skewing results in any way. In this case, you should enable the Hide vote counts option.
Participants will get a confirmation of their vote but won't be able to see how others voted. Poll creator will be able to see current results by clicking the poll settings button [···] on the poll message.
❗️ Note that this doesn't make the poll anonymous. If the anonymous option wasn't set, the creator of the poll will be able to see authors of each vote.
🔺 Change upvote emoji
To jazz up your polls and make them more fun, engaging and really stand out in a torrent of messages - you can set a custom emoji for your poll.
For example, you can use 👍 for preference polls, ✋ to raise hands for attendance, 🍹 for a poll where you're deciding which bar to go to...
Poll Settings for active Polls
Once you've sent a poll, you can perform additional actions on them.
Locate the poll in a channel and click the settings button with three dots [···]
If you are the creator of the poll you will get a dialog with several options:
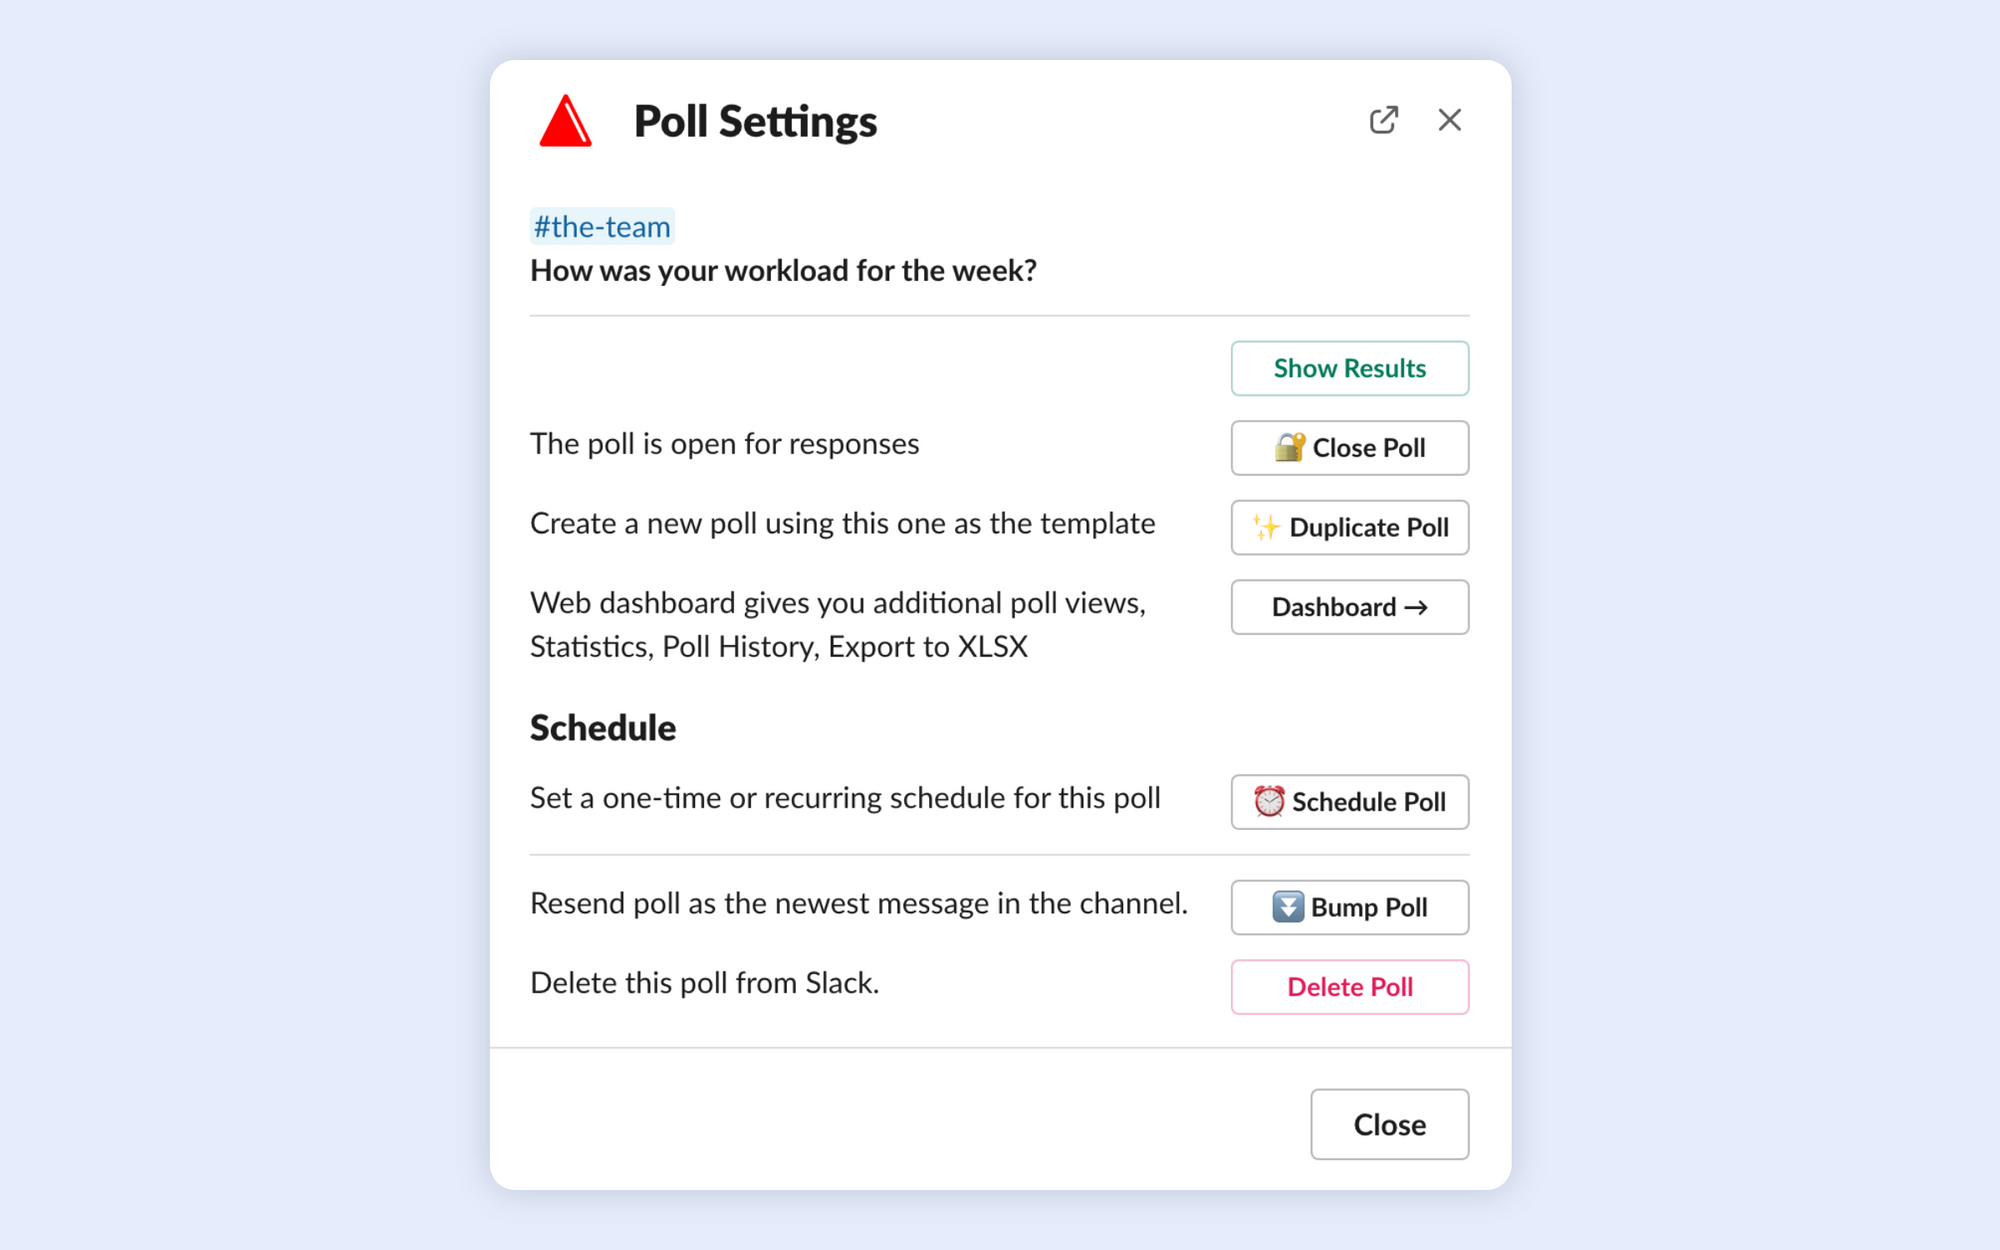
- Show Results - if you chose the Hide vote counts option, you can see them by clicking this button.
- Close Poll/Reopen Poll - Close the poll for further responses. You can close and reopen the poll as many times as you want.
- Duplicate poll - Create a new poll starting with this one as the template
- Dashboard - Go to web dashboard where you can see advanced views, trend lines for recurring polls, all your poll history. This is also the place to go if you want to get your poll results exported to an XLSX file.
- Schedule Poll - set a one time or recurring schedule for this poll
- Bump Poll - if your poll got lost in a busy channel, use this button to resend it as the newest message in the channel.
- Delete Poll - delete the poll from Slack channel
Web Dashboard
You'll notice that almost all interaction you'll have with Upvote is done directly in Slack. However, it's more comfortable to perform some actions through a web interface.
To get your complete poll history, access analytics for recurring polls, export polls to .xlsx, and manage your subscription plans - you'll use the Upvote Dashboard
ℹ️ To access the dashboard visit https://dash.upvote.chat/
You will do a secure Sign-in with Slack. Note that your Slack login credentials are never shared with Upvote.
Poll Analytics
Once you've accessed a poll via Upvote Dashboard, you'll see the entire poll history with additional views. These are typically used to present and analyze polls in more depth.
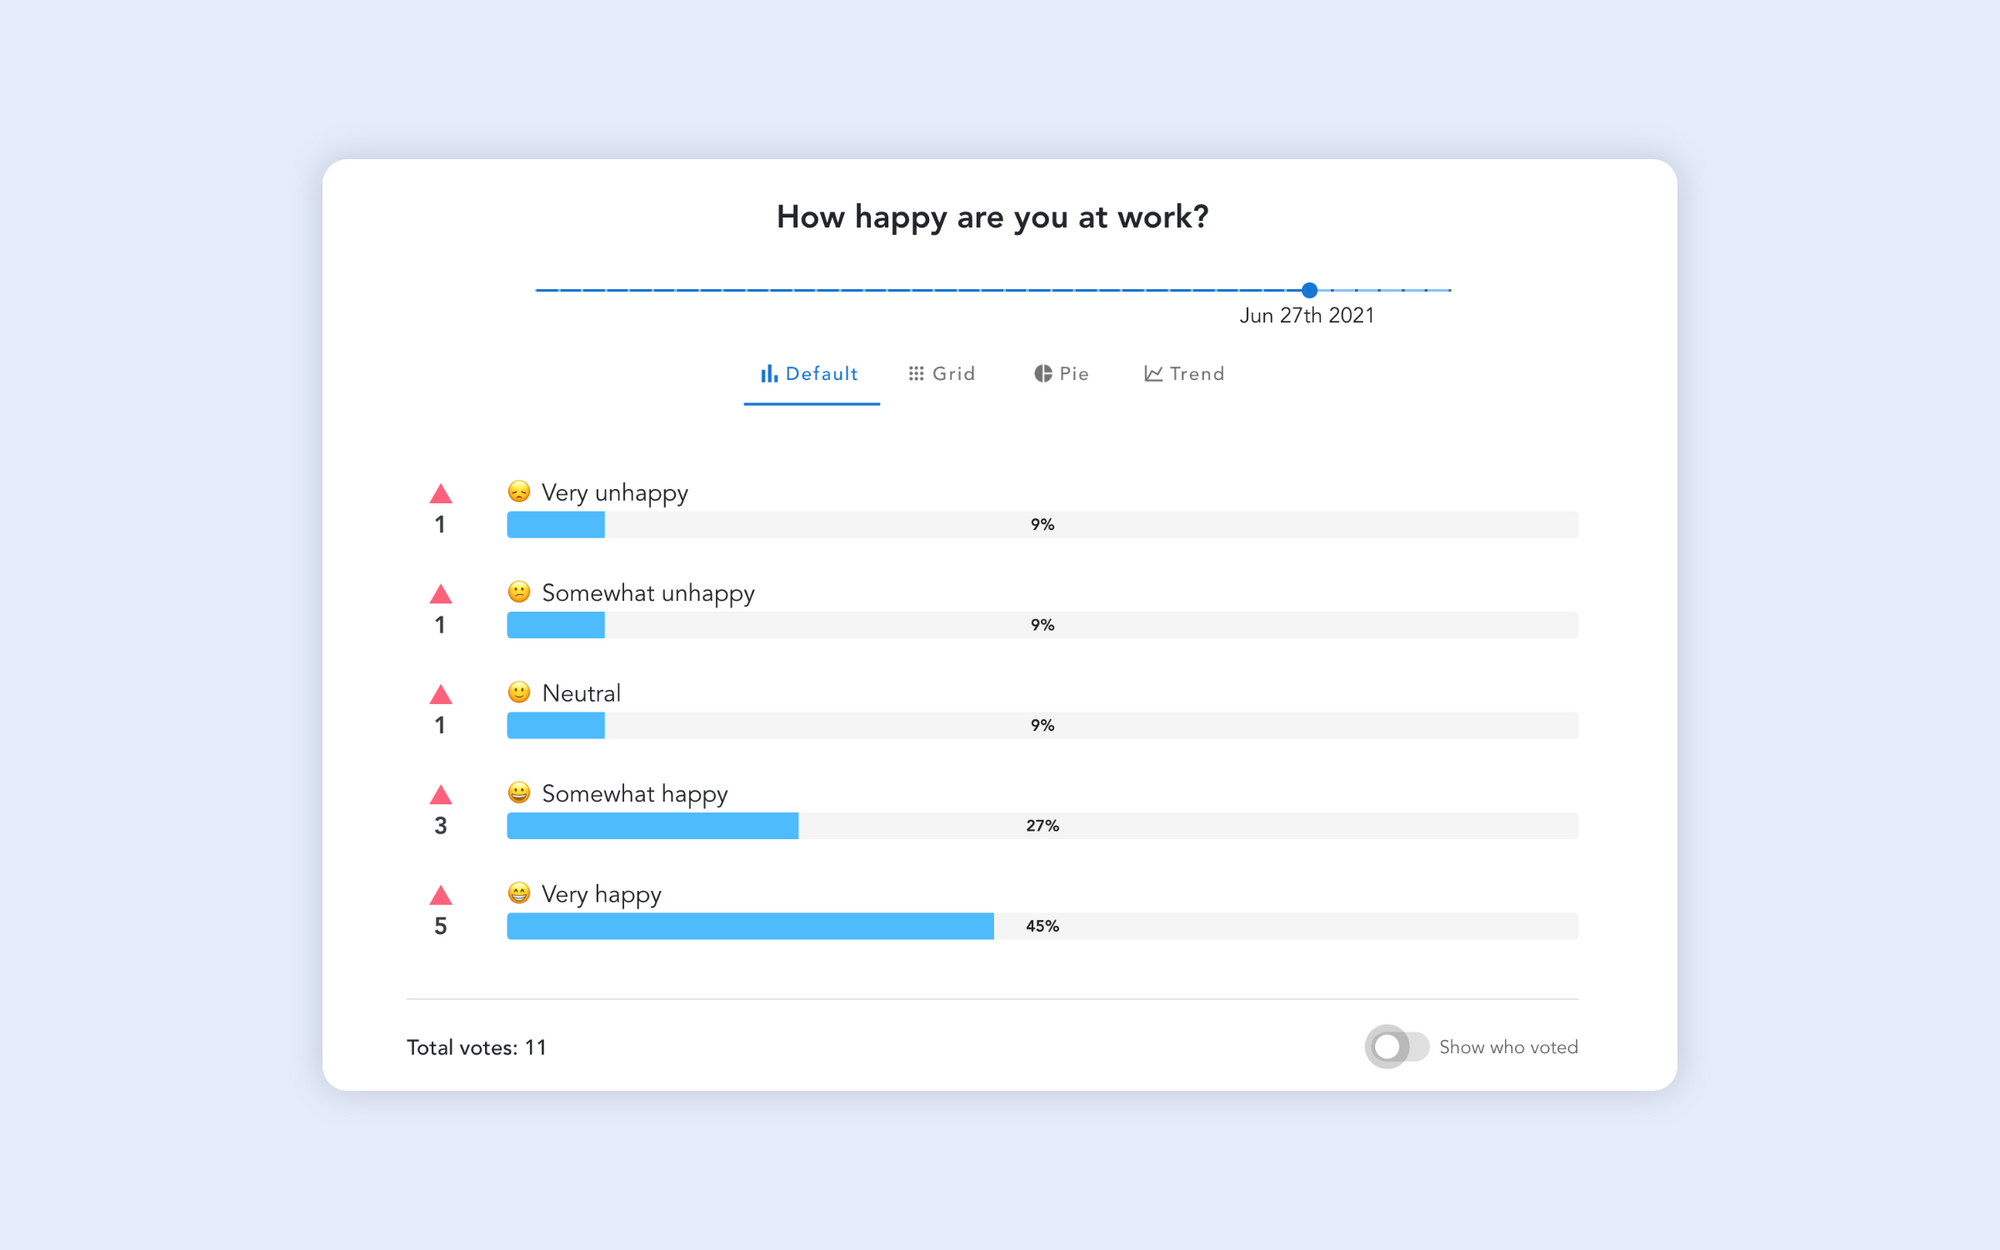
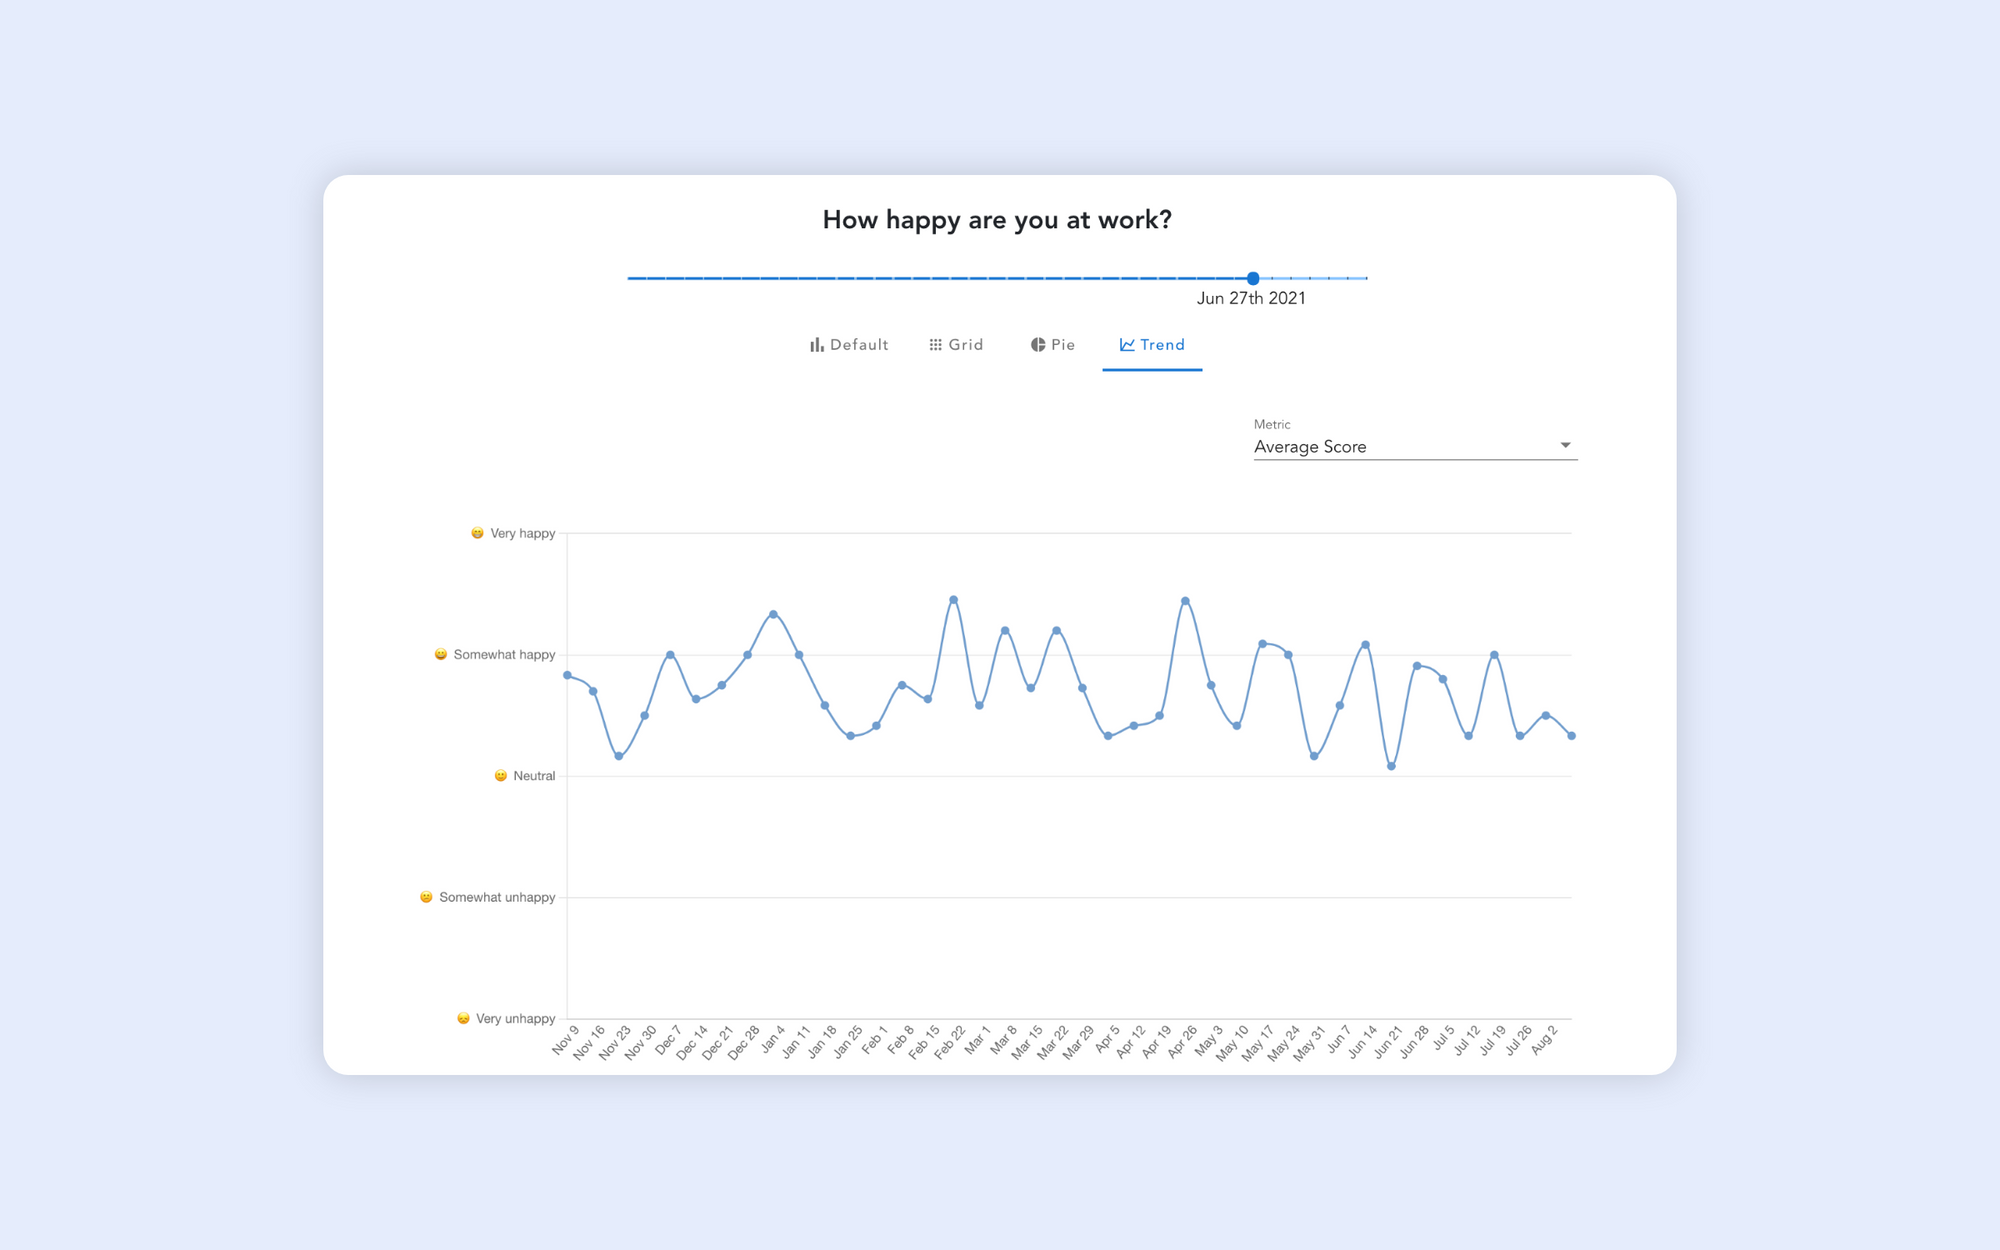
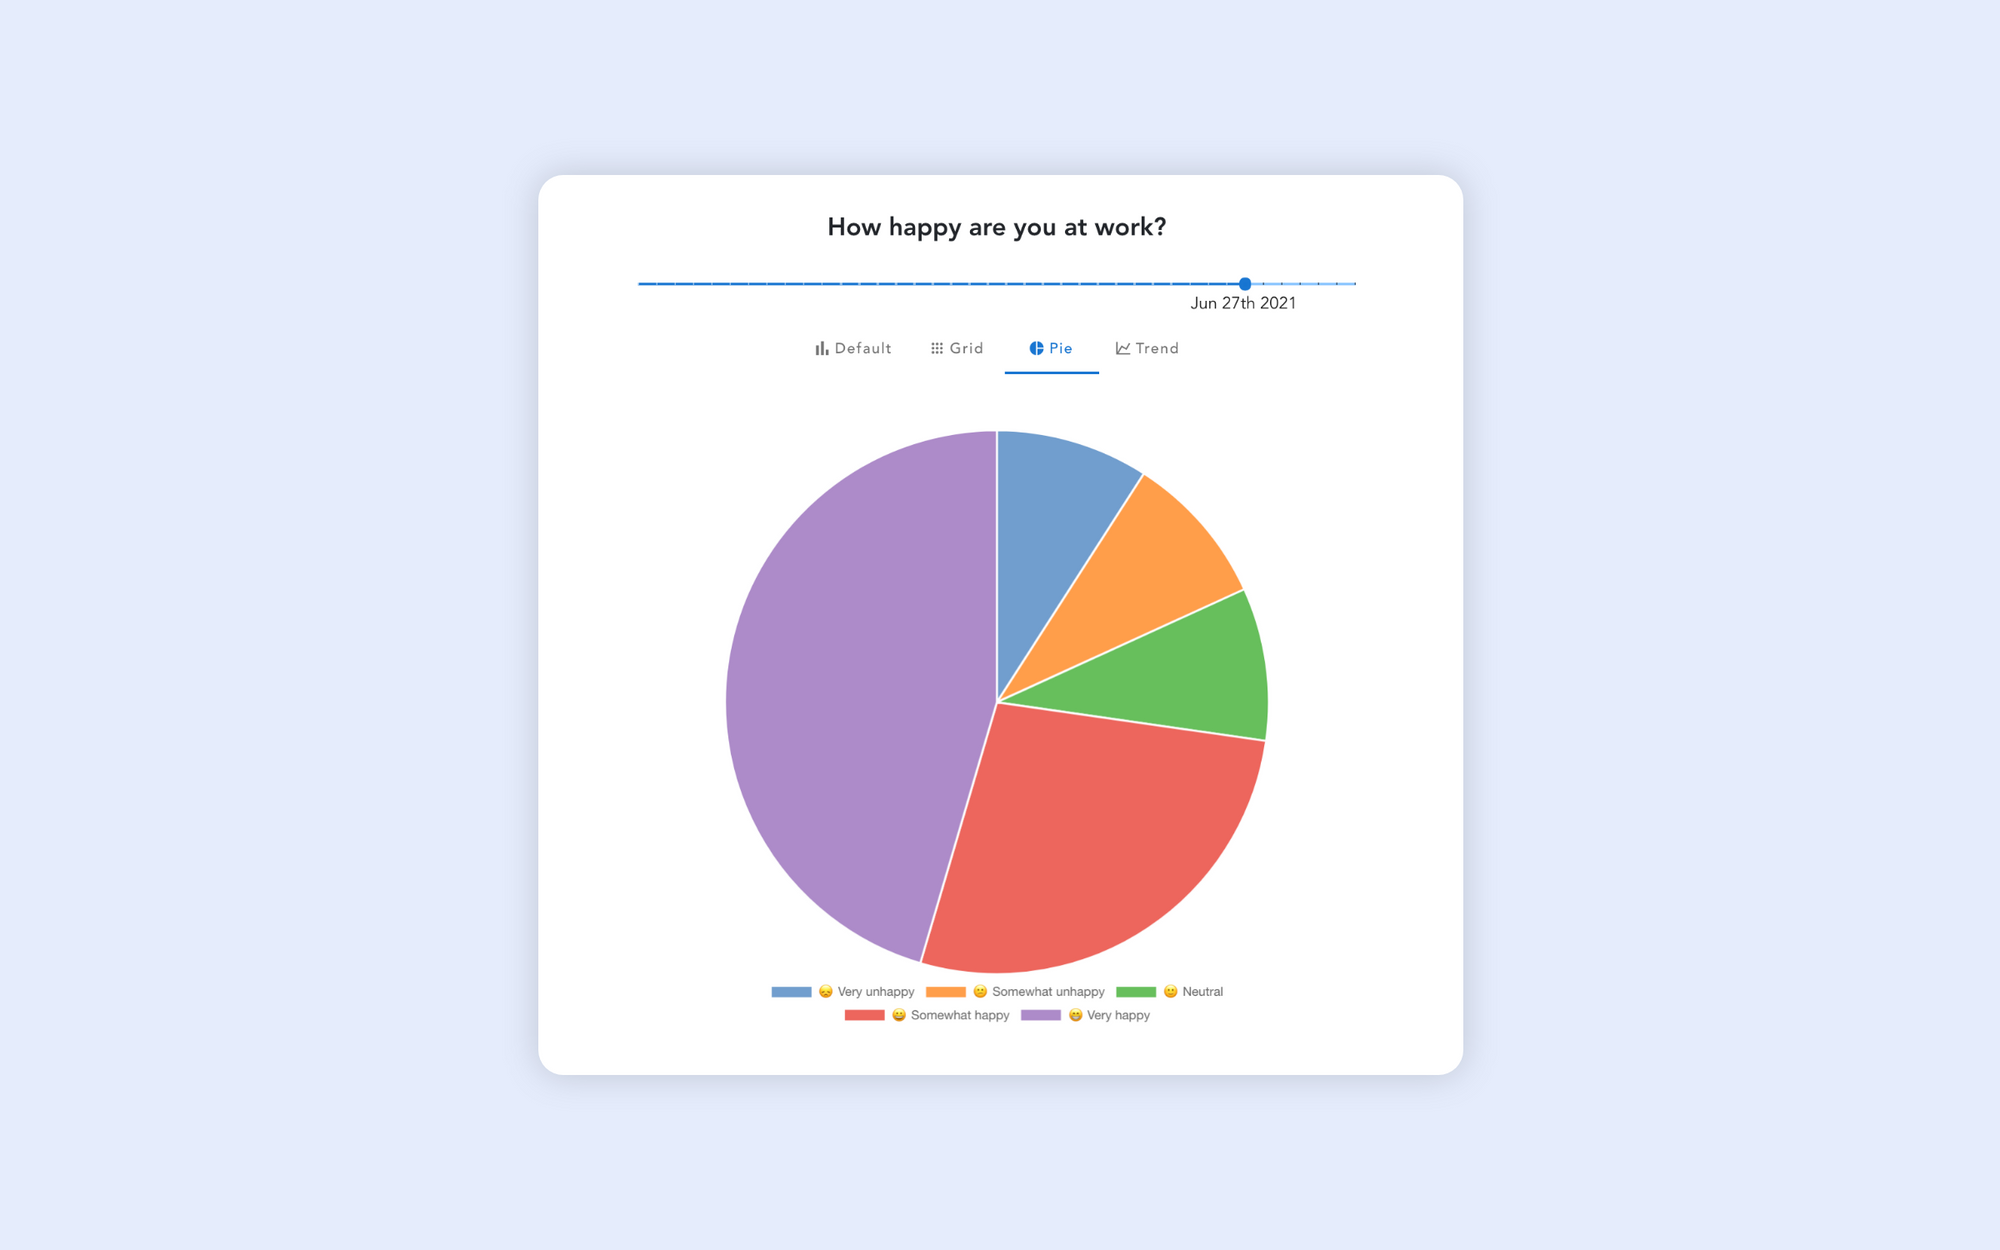
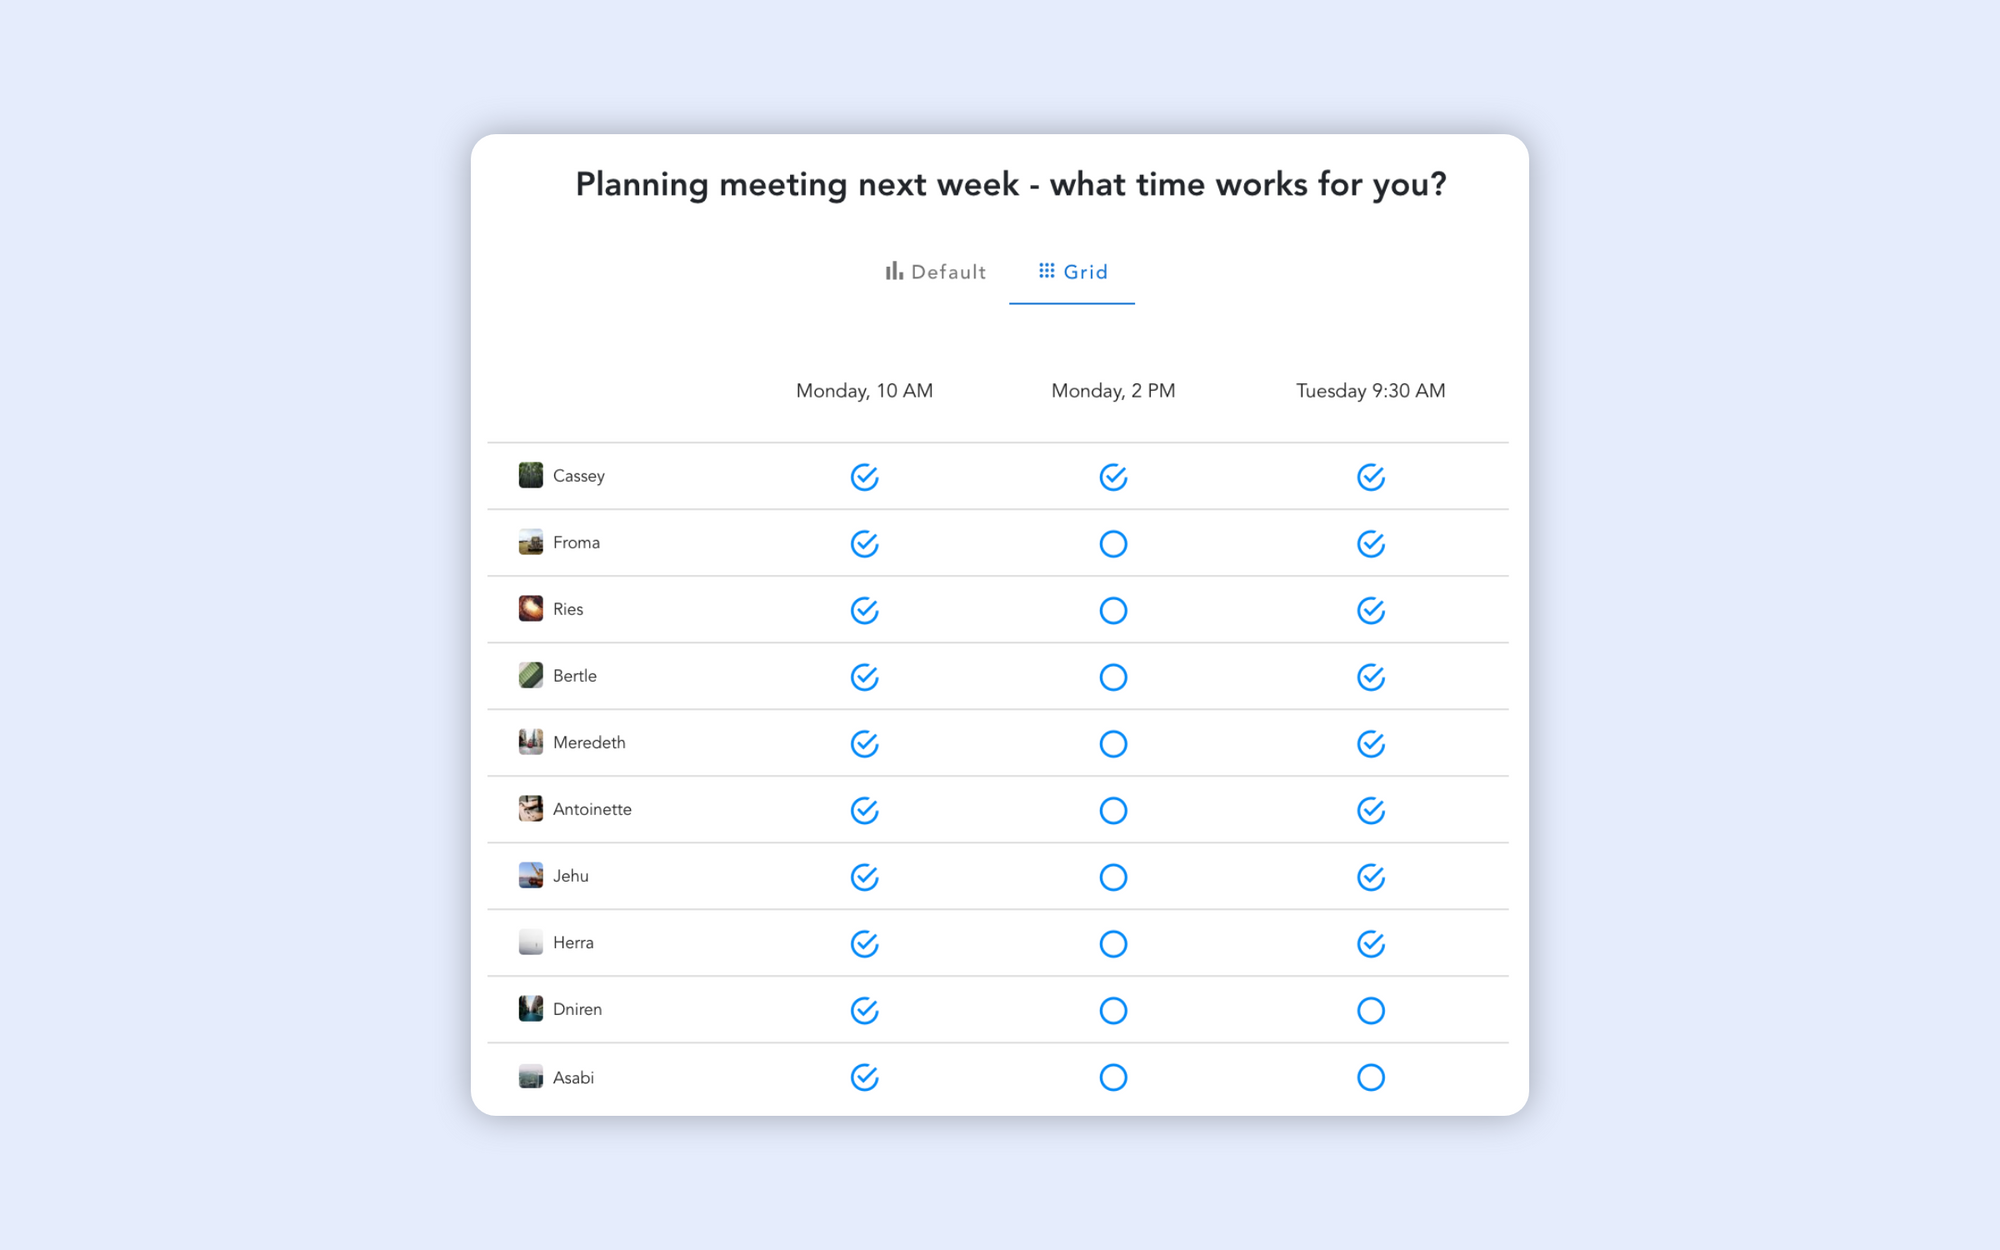
Default vs Grid View
Grid view conveniently shows you who voted for each option.
It is especially useful for cases such as attendance or RSVP polls, where you're looking for the best time that suits most people.
Consider the following two views of the same poll:
How to Upgrade Your Plan
In order to upgrade to a paid plan and manage your subscription, please go to Subscription Settings.
Note: Only Workspace admins can upgrade and manage subscription plans.
For pricing and plan comparison, please see Pricing